![]()

In this chapter, you’ll learn:
Layers and functions of skin
Types of wounds
Phases of wound healing
Ways to classify wounds according to age, depth, and color
Basic wound care assessment and treatment
Pressure ulcer prevention, care, and treatment.
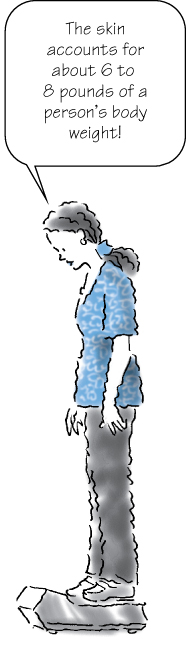
The skin, or integumentary system, is the largest organ in the body. It accounts for about 6 to 8 lb (2.5 to 3.5 kg) of a person’s body weight and has a surface area of more than 20 square feet. The thickest skin is located on the hands and the soles of the feet; the thinnest skin, around the eyes and over the tympanic membranes in the ears.
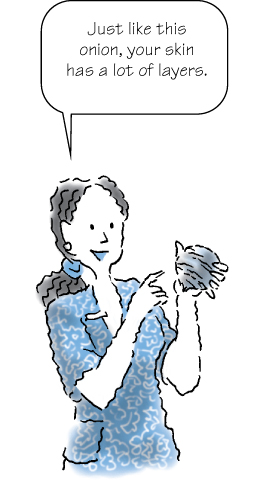
Skin is made up of distinct layers that function as a single unit. The outermost layer, which is actually a layer of dead cells, is completely replaced every 4 to 6 weeks by cells that migrate to the surface from the layers beneath. The living cells in the skin receive oxygen and nutrients through an extensive network of small blood vessels. In fact, every square inch of skin contains more than 158 blood vessels!
Skin protects the body by acting as a barrier between internal structures and the external world. Skin also stands between each of us and the social world around us, so it’s no wonder that the condition and characteristics of a person’s skin influence how he feels about himself. When a person has healthy skin—unblemished skin with good tone (firmness) and color—he feels better about himself. Skin also reflects the body’s general physical health. For example, if blood oxygen levels are low, skin may look bluish, and skin appears flushed or red if a person has a fever.
Any damage to the skin is considered a wound. Wounds can result from planned events, such as surgery, or unplanned events, including accidents such as a fall from a bike, and exposure to the environment, such as the damage caused by ultraviolet (UV) rays in sunlight.

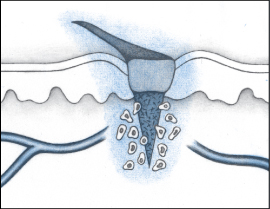
Skin has two main layers: the epidermis and the dermis, which function as one interrelated unit. A layer of subcutaneous fatty connective tissue, sometimes called the hypodermis, lies beneath these layers. Five structural networks, which are stabilized by hair and sweat gland ducts, exist within the epidermis and dermis:
 Collagen fibers
 Elastic fibers
 Small blood vessels
 Nerve fibrils
 Lymphatics.
The epidermis is the outermost of the skin’s two main layers. It varies in thickness from about 0.1-mm thick on the eyelids to as much as 1-mm thick on the palms and soles. The epidermis is slightly acidic, with an average pH of 5.5. This is a really important point as the skin’s acidity is protective and when altered may lead to skin breakdown. Covering the epidermis is the keratinized epithelium, a layer of cells that migrate up from the underlying dermis and die upon reaching the surface. These cells are continuously generated and replaced. The keratinized epithelium is supported by the dermis and underlying connective tissue.
You can remember the order of the skin’s layers by thinking of the prefix epi-, which means “upon.” Therefore, the epidermis is upon, or on top of, the dermis.
The epidermis also contains melanocytes (cells that produce the brown pigment melanin), which give skin and hair their colors. The more melanin produced by melanocytes, the darker the skin. Skin color varies from one person to the next, but it can also vary from one area of skin on the body to another. The hypothalamus regulates melanin production by secreting melanocyte-stimulating hormone.
The epidermis is divided into five distinct layers. Each layer’s name reflects its structure or its function. Here’s a look at them from the outside in:
 The stratum corneum (horny layer) is the superficial layer of dead skin cells—the skin layer that’s in contact with the environment. It has an acid mantle that helps protect the body from some fungi and bacteria. Cells in this layer are shed daily and replaced with cells from the layer beneath it, the stratum lucidum. In such diseases as eczema and psoriasis, the stratum corneum may become abnormally thick and irritate skin structures and peripheral nerves.
 The stratum lucidum (clear layer) is a single layer of cells that forms a transitional boundary between the stratum corneum above and stratum granulosum below. This layer is most evident in areas where skin is thickest, as on the soles of the feet. It appears to be absent in areas where skin is especially thin, as on the eyelids. Although cells in this layer lack active nuclei, this is an area of intense enzyme activity that prepares cells for the stratum corneum.
 The stratum granulosum (granular layer) is one to five cells thick and is characterized by flat cells with active nuclei. Experts believe this layer aids keratin formation.
 The stratum spinosum is the area in which cells begin to flatten as they migrate toward the skin surface.
 The stratum basale or stratum germinativum is only one cell thick and is the only layer of the epidermis in which cells undergo mitosis to form new cells. The stratum basale forms the dermoepidermal junction—the area where the epidermis and dermis are connected. Protrusions of this layer (called rete pegs or epidermal ridges) extend down into the dermis where they’re surrounded by vascularized dermal papillae. This unique structure supports the epidermis and facilitates the exchange of fluids and cells between the skin layers.
| Memory Jogger |
To remember the five layers of the epidermis, think, “Contiguous Layers Generate Skin Barriers.” In other words, the epidermis consists of the stratum:
|
The dermis—the thick, deeper layer of skin—is composed of collagen and elastin fibers and an extracellular matrix, which contributes to skin’s strength and pliability. Collagen fibers give skin its strength, and elastin fibers provide elasticity. The meshing of collagen and elastin determines the skin’s physical characteristics.
Structural supports: Collagen and elastinNormally, skin returns to its original position after it’s pulled on due to the actions of the connective tissues collagen and elastin—two key components of skin. Collagen and elastin work together to support the dermis and give skin its physical characteristics.
| Collagen Collagen fibers form tightly woven networks in the papillary layer of the dermis. These fibers are relatively inextensible and nonelastic and, therefore, give the dermis high tensile strength. In addition, collagen constitutes approximately 70% of the skin’s dry weight and is the skin’s principal structural body protein. |
| Elastin Elastin is made up of wavy fibers that intertwine with collagen in horizontal arrangements at the lower dermis and vertical arrangements at the epidermal margin. Elastin makes skin pliable and is the structural protein that enables extensibility in the dermis. |
| Seeing the effects of age As a person ages, collagen and elastin fibers break down and the fine lines and wrinkles that are associated with aging develop. Extensive exposure to sunlight accelerates this breakdown process. Deep wrinkles are caused by changes in facial muscles. Over time, laughing, crying, smiling, and frowning cause facial muscles to thicken and eventually cause wrinkles in the overlying skin. |
In addition, the dermis contains:
Blood vessels and lymphatic vessels, which transport oxygen and nutrients to cells and remove waste products
Nerve fibers and hair follicles, which contribute to skin sensation, temperature regulation, and excretion and absorption through the skin
Fibroblast cells, which are important in the production of collagen and elastin.
The dermis is composed of two layers of connective tissue:
 The papillary dermis, the outermost layer, is composed of collagen and reticular fibers, which are important in healing wounds. Capillaries in the papillary dermis carry the nourishment needed for metabolic activity.
 The reticular dermis is the innermost layer. It’s formed by thick networks of collagen bundles that anchor it to the subcutaneous tissue and underlying support structures, such as fasciae, muscle, and bone.
Although sebaceous glands and sweat glands appear to originate in the dermis, they’re actually appendages of the epidermis that extend downward into the dermis.
Sebaceous glands, found primarily in the skin of the scalp, face, upper body, and genital region, are part of the same structure that contains hair follicles. These saclike glands produce sebum, a fatty substance that lubricates and softens the skin.
Sweat glands are tightly coiled tubular glands; the average person has roughly 2.6 million of them. They’re present throughout the body in varying amounts. The palms and soles have many, but the external ear, lip margins, nail beds, and glans penis have none.
The secreting portion of the sweat gland originates in the dermis and the outlet is on the surface of the skin. The sympathetic nervous system regulates the production of sweat, which, in turn, helps control body temperature.
There are two types of sweat glands:
 Eccrine glands are active at birth and are found throughout the body. They’re most dense on the palms, soles of the feet, and forehead. These glands connect to the skin’s surface through pores and produce sweat that lacks proteins and fatty acids. Eccrine glands are smaller than apocrine glands.
 Apocrine glands begin to function at puberty. These glands open into hair follicles; therefore, most are found in areas where hair typically grows, such as the scalp, groin, and axillary region. The coiled secreting portion of the gland lies deep in the dermis (deeper than eccrine glands), and a duct connects it to the upper portion of the hair follicle. The sweat produced by apocrine glands contains water, sodium, chloride, proteins, and fatty acids. It’s thicker than the sweat produced by eccrine glands and has a milky white or yellowish tinge.
The sweat produced by apocrine glands contains the same water, sodium, and chloride found in the sweat produced by eccrine glands. However, it also contains proteins and fatty acids. The unpleasant odor associated with sweat comes from the interaction of bacteria with these proteins and fatty acids.
The subcutaneous tissue, or hypodermis, is a subdermal (below the skin) layer of loose connective tissue that contains major blood vessels, lymph vessels, and nerves. Subcutaneous tissue:
Has a high proportion of fat cells and contains fewer small blood vessels than the dermis
Varies in thickness depending on body type and location
Constitutes 15% to 20% of a man’s weight; 20% to 25% of a woman’s weight
Insulates the body
Absorbs shocks to the skeletal system
Helps skin move easily over underlying structures.

The skin receives its blood supply through vessels that originate in the underlying muscle tissue. Here, arteries branch into smaller vessels, which then branch into the network of capillaries that permeate the dermis and subcutaneous tissue.
Within the vascular system, only capillaries have walls thin enough (typically only a single layer of endothelial cells) to let solutes pass through. These thin walls allow nutrients and oxygen to pass from the bloodstream into the interstitial space around skin cells. At the same time, waste products pass into the capillaries and are carried away. The pressure of arterial blood entering the capillaries is approximately 30 mm Hg. The pressure of venous blood leaving the capillaries is approximately 10 mm Hg. This 20 mm Hg difference in pressure within the capillaries is quite low when compared with the pressure found in the larger arteries in the body (85 to 100 mm Hg), which is known as blood pressure.
The skin’s lymphatic system helps remove waste products from the dermis.
Lymphatic vessels, or lymphatics for short, are similar to capillaries in that they’re thin-walled, permeable vessels. However, lymphatics aren’t part of the blood circulatory system. Instead, the lymphatics belong to a separate system that removes proteins, large waste products, and excess fluids from the interstitial spaces in skin and transports them to the venous circulation. The lymphatics merge into two main trunks—the thoracic duct and the right lymphatic duct—which empty into the junction of the subclavian and internal jugular veins.
Skin performs or participates in a host of vital functions, including:
Protection of internal structures
Sensory perception
Thermoregulation
Excretion
Metabolism
Absorption
Social communication.
Damage to skin impairs its ability to carry out these important functions. Let’s take a closer look at each.
Skin acts as a physical barrier to microorganisms and foreign matter, protecting the body against infection. It also protects underlying tissue and structures from mechanical injury. Consider the feet for a moment. As a person walks or runs, the soles of the feet withstand a tremendous amount of force, yet the underlying tissue and bone structures remain unharmed.
The skin also helps maintain a stable environment inside the body by preventing the loss of water, electrolytes, proteins, and other substances. Any damage (any wound) jeopardizes this protection. However, when damaged, skin goes into repair mode to restore full protection by stepping up the normal process of cell replacement.
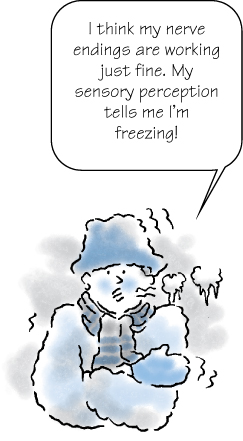
Nerve endings in the skin allow a person literally to touch the world around him. Sensory nerve fibers originate in the nerve roots along the spine and supply specific areas of the skin known as dermatomes. Dermatomes are used to document sensory function. This same network helps a person avoid injury by making him aware of pain, pressure, heat, and cold.
Sensory nerves exist throughout the skin; however, some areas are more sensitive than others—for example, the fingertips are more sensitive than the back. Sensation allows us to identify potential dangers and avoid injury. Any loss or reduction of sensation, local or general, increases the chance of injury.
Thermoregulation, or control of body temperature, involves the concerted effort of nerves, blood vessels, and eccrine glands in the dermis.
When skin is exposed to cold or internal body temperature falls, blood vessels constrict, reducing blood flow and thereby conserving body heat.
Similarly, if skin becomes too hot or internal body temperature rises, small arteries within the skin dilate, increasing the blood flow, and sweat production increases to promote cooling.
Unlikely as it may seem at first, the skin is an excretory organ. Excretion through the skin plays an important role in thermoregulation, electrolyte balance, and hydration. In addition, sebum excretion helps maintain the skin’s integrity and suppleness.
Through its more than two million pores, skin efficiently transmits trace amounts of water and body wastes to the environment. At the same time, it prevents dehydration by ensuring that the body doesn’t lose too much water. Sweat carries water and salt to the skin surface, where it evaporates, aiding thermoregulation and electrolyte balance. In addition, a small amount of water evaporates directly from the skin itself each day. A normal adult loses about 500 ml of water per day this way. While the skin is busy regulating fluids that are leaving the body, it’s equally busy preventing unwanted or dangerous fluids from entering the body.
Skin also helps maintain the mineralization of bones and teeth. A photochemical reaction in the skin produces vitamin D, which is crucial to the metabolism of calcium and phosphate. These minerals, in turn, play a central role in the health of bones and teeth.
When skin is exposed to sunlight—the UV spectrum in sunlight, to be specific—vitamin D is synthesized in a photochemical reaction. Keep in mind, however, that although some sunlight works wonders, overexposure to UV light causes skin damage that reduces its ability to function properly.
Some drugs and, unfortunately, some toxic substances—for example, pesticides—can be absorbed directly through the skin and into the bloodstream. This process has been used to treat certain disorders via skin patch drug delivery systems. One of the best known examples of this method is the patch used in some nicotine withdrawal programs. However, today, this technology is also used to administer some forms of hormone replacement therapy, nitroglycerin, and some pain medications.
A commonly overlooked but important function of the skin is its role in self-esteem development and social communication. Every time a person looks in the mirror, he decides whether he likes what he sees. Although bone structure, body type, teeth, and hair (or lack thereof!) all have an impact, the condition and characteristics of skin can have the greatest impact on a person’s self-esteem. Ask any teenager with acne. If a person likes what he sees, self-esteem rises; if he doesn’t, it sags.
Virtually every interpersonal exchange includes the nonverbal languages of facial expression and body posture. Level of self-esteem and skin characteristics, which are visible at all times, have an impact on how a person communicates verbally and nonverbally and how a listener receives the person communicating.

Because the physical characteristics of skin are so closely linked to self-perception, there has been a proliferation of skin care products and surgical techniques offered to keep skin looking young and healthy.
Any break in the skin is considered a wound. Wounds can result from a planned event, such as surgery, or from an unexpected event, such as an accident, trauma, or exposure to pressure, heat, sun, or chemicals. Tissue damage in wounds varies widely, from a superficial break in the epithelium to deep trauma that involves the muscle and bone.
A “clean” wound is a wound produced by surgery. A wound is described as “dirty” if it may contain bacteria or debris. Trauma typically produces dirty wounds. The rate of recovery is influenced by the extent and type of damage incurred as well as other intrinsic factors, such as patient circulation, nutrition, hydration, and the presence of a chronic illness. However, regardless of the cause of a wound, the healing process is similar in all cases.
Wounds are classified by the way the wound closes. A wound can close by primary intention, secondary intention, or tertiary intention.
Primary healing involves re-epithelialization, in which the skin’s outer layer grows closed. Cells grow in from the margins of the wound and out from epithelial cells lining the hair follicles and sweat glands.
Wounds that heal through primary intention are, most commonly, superficial wounds that involve only the epidermis and don’t involve the loss of tissue—a first-degree burn, for example. However, a wound that has well-approximated edges (edges that can be pulled together to meet neatly), such as a surgical incision, also heals through primary intention. Because there’s no loss of tissue and little risk of infection, the healing process is predictable. These wounds usually heal in 4 to 14 days and result in minimal scarring.

A wound that involves some degree of tissue loss heals by secondary intention. The edges of these wounds can’t be easily approximated, and the wound itself is described as partial thickness or full thickness, depending on its depth:
Partial-thickness wounds extend through the epidermis and into, but not through, the dermis.
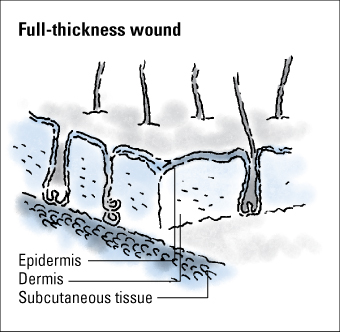
Full-thickness wounds extend through the epidermis and dermis and may involve subcutaneous tissue, muscle, and possibly, bone.
During healing, wounds that heal by secondary intention fill with granulation tissue, a scar forms, and re-epithelialization occurs, primarily from the wound edges. Pressure ulcers, burns, dehisced surgical wounds, and traumatic injuries are examples of this type of wound. These wounds also take longer to heal, result in scarring, and have a higher rate of complications, such as the development of an infection, than wounds that heal by primary intention.
When a wound is intentionally kept open to allow edema or infection to resolve or to permit removal of exudate, the wound heals by tertiary intention or delayed primary intention. These wounds result in more scarring than wounds that heal by primary intention but less than wounds that heal by secondary intention.
The healing process is the same for all wounds, whether the cause is mechanical, chemical, or thermal.
Health care professionals discuss the process of wound healing in four specific phases:
Hemostasis
Inflammation
Proliferation
Maturation.
Although this categorization is useful, it’s important to remember that healing rarely occurs in this strict order. Typically, the phases of wound healing overlap.
| Stay on the Ball |
| How wounds heal The healing process begins at the instant of injury and proceeds through a repair “cascade,” as outlined here.
|


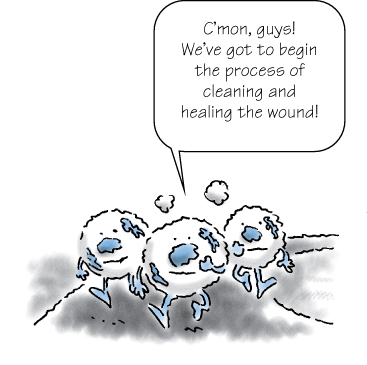
Immediately after an injury, the body releases chemical mediators and intercellular messengers called growth factors that begin the process of cleaning and healing the wound.
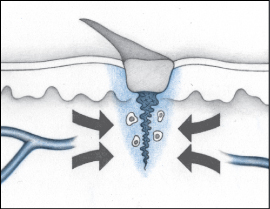
When blood vessels are damaged, the small muscles in the walls of the vessels contract (vasoconstriction), reducing the flow of blood to the injury and minimizing blood loss. Vasoconstriction can last as long as 30 minutes.
Next, blood leaking from the inflamed, dilated, or broken vessels begins to coagulate. Collagen fibers in the wall of the damaged blood vessels activate the platelets in the blood in the wound. Aided by the action of prostaglandins, the platelets enlarge and stick together to form a temporary plug in the blood vessel, which helps prevent further bleeding. The platelets also release additional vasoconstrictors such as serotonin, which help prevent further blood loss. Thrombin forms in a cascade of events stimulated by the platelets, and a clot forms to close the small vessels and stop the bleeding.
This initial phase of wound healing occurs almost immediately after the injury occurs and works quickly (within minutes) in small wounds. It’s less effective in stopping the bleeding in larger wounds.
The inflammatory phase is a defense mechanism and a crucial component of the healing process. During this phase, the wound is cleaned and the process of rebuilding begins. This phase is marked by swelling, redness, and heat at the wound site.
During the inflammatory phase, vascular permeability increases, permitting serous fluid carrying small amounts of cell and plasma protein to accumulate in the tissue around the wound (edema). The accumulation of fluid causes the damaged tissue to appear swollen, red, and warm to the touch.
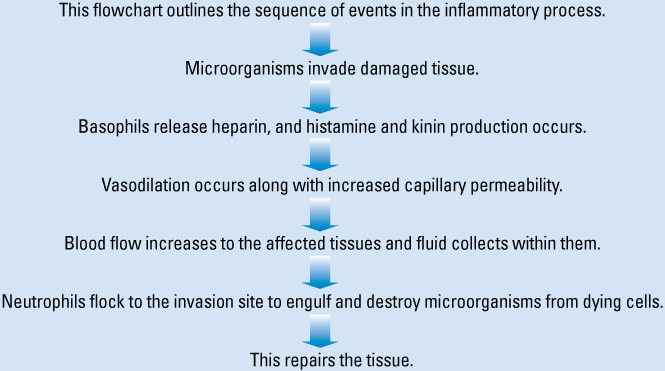
During the early phase of the inflammatory process, neutrophils (one type of white blood cell [WBC]) enter the wound. The primary role of neutrophils is phagocytosis or the removal and destruction of bacteria and other contaminants.
As neutrophil infiltration slows, monocytes appear. Monocytes are converted into activated macrophages and continue the job of cleaning the wound. The macrophages play a key role early in the process of granulation and re-epithelialization by producing growth factors and by attracting the cells needed for the formation of new blood vessels and collagen.
The inflammatory phase of healing is important in preventing wound infection. The process is negatively influenced if the patient has a systemic condition that suppresses his immune system or if he’s undergoing immunosuppressive therapy. In clean wounds, the inflammatory response lasts from 3 to 6 days. In dirty or infected wounds, the response can last much longer.
During the proliferation phase of the healing process, the body:
Fills the wound with connective tissue (granulation)
Contracts the wound edges (contraction)
Covers the wound with epithelium (epithelialization).
All wounds go through the proliferation phase, which begins on day 3 and lasts until about day 21, but it takes much longer in wounds with extensive tissue loss. Although phases overlap, wound granulation generally starts when the inflammatory response is complete. As the inflammatory phase subsides, the wound drainage (exudate) begins to decrease.
The proliferation phase involves regeneration of blood vessels (angiogenesis) and the formation of connective or granulation tissue, which is fragile and can bleed easily. The development of granulation tissue requires an adequate supply of blood and nutrients. Endothelial cells in blood vessels in surrounding tissue reconstruct damaged or destroyed vessels by first migrating and then proliferating to form new capillary beds. As the beds form, this area of the wound takes on a red, granular appearance. This tissue is a good defense against contaminants, but it’s also quite fragile and bleeds easily.
During the proliferation phase, growth factors prompt fibroblasts to migrate to the wound. Fibroblasts are the most common cell in connective tissue. They’re responsible for making fibers and ground substance—also known as extracellular matrix—which provides support to cells. At first, fibroblasts populate just the margins of the wound but, later, they spread over the entire wound surface.
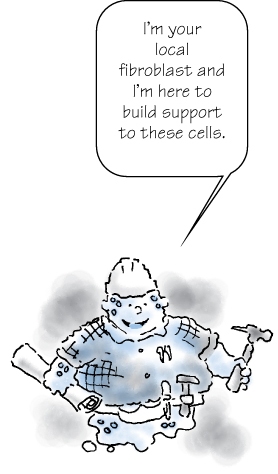
Fibroblasts have the important task of synthesizing collagen fibers that, in turn, produce keratinocyte, a growth factor needed for re-epithelialization. This process necessitates a delicate balance of collagen synthesis and lysis (making new and removing old). If the process yields too much collagen, increased scarring results. If the process yields too little collagen, scar tissue is weak and easily ruptured. Because fibroblasts require a supply of oxygen to perform their important role, capillary bed regeneration is crucial to the process.
As healing progresses, myofibroblasts and the newly formed collagen fibers contract, pulling the wound edges toward each other. Contraction reduces the amount of granulation tissue needed to fill the wound, thereby speeding the healing process.
Contraction versus contractureContraction and contracture occur during the wound healing process. Although they have mechanisms in common, it’s important to understand how contraction and contracture differ.
| Contraction Contraction, a desirable process that takes place during healing, occurs when the edges of a wound pull toward the center of the wound to close it. Contraction continues to close the wound until tension in the surrounding skin causes it to slow and then stop. |
| Contracture Contracture is an undesirable process and a common complication of burn scarring. Typically, contracture occurs after healing is complete. Contracture involves an inordinate amount of pulling or shortening of tissue, resulting in an area of tissue with only limited ability to move. It’s especially problematic over joints, which may be pulled to a flexed position. Stretching is the only way to overcome contracture, and patients typically require physical therapy. |
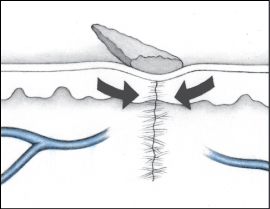
Complete healing occurs only after epithelial cells have completely covered the surface of the wound. As this occurs, keratinocytes switch from a migrating mode to a differentiating mode. The epidermis thickens and becomes differentiated, and the wound is closed. Any remaining scab comes off and the new epidermis is toughened by the production of keratin, which also returns the skin to its original color.
The final phase of wound healing is maturation, which is marked by shrinking and strengthening of the scar. This is a gradual, transitional phase of healing that can continue for months or even years after the wound have closed.
During this phase, fibroblasts leave the site of the wound, vascularization is reduced, the scar shrinks and becomes pale, and the mature scar forms. If the wound involved extensive tissue destruction, the scar won’t contain hair, sweat, or sebaceous glands.
The wound gradually gains tensile strength. In primary intention wounds, tissues will achieve approximately 30% to 50% of their original strength between days 1 and 14. When fully healed, tissue will achieve, at best, approximately 80% of its original strength. Scar tissue will always be less elastic than the surrounding skin.
The healing process is affected by many factors. The most important influences include:
Nutrition
Oxygenation
Infection
Age
Chronic health conditions
Medications
Smoking.
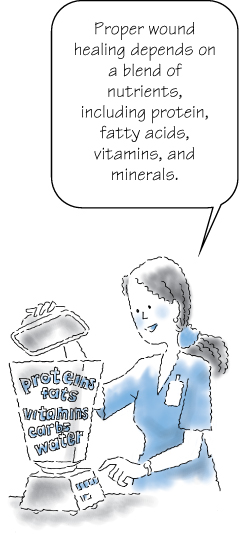
Proper nutrition is arguably the most important factor affecting wound healing. Unfortunately, malnutrition is a common finding among patients with wounds. For older adults, the problem is more pervasive.
Poor nutrition prolongs hospitalization and increases the risk of medical complications, with the severity of complications being directly related to the severity of the malnutrition. In older patients, malnutrition is known to increase the risk of pressure ulcers and delay wound healing. It may also contribute to poor tensile strength in healing wounds, with an associated increase in the risk of wound dehiscence.

Protein is critical for wounds to heal properly. In fact, a person needs to double the recommended dietary allowance of protein (from 0.8 g/kg/day to 1.6 g/kg/day) before tissue even begins to heal. If a significant amount of body weight has been lost in connection with the injury, as much as 50% of the lost weight must be regained before healing will begin. A patient who lacks protein reserves heals slowly, if at all, and a patient who’s borderline malnourished can easily become malnourished under this demand.
The body needs protein to form collagen during the proliferation phase. Without adequate protein, collagen formation is reduced or delayed and the healing process slows. Studies of malnourished patients indicate that they have lower levels of serum albumin, which results in slower oxygen diffusion and, in turn, a reduction in the ability of neutrophils to kill bacteria. Wound exudate alone can contain up to 100 g of protein per day.
Fatty acids (lipids) are used in cell structures and play a role in the inflammatory process. Also, vitamins C, B complex, A, and E and the minerals iron, copper, zinc, and calcium are important in the healing process. A zinc deficiency adversely affects the proliferation phase by slowing the rate of epithelialization and decreasing the strength of collagen produced—and, thus, the strength of the wound.
In addition to protein and zinc, collagen synthesis requires supplies of carbohydrates and fat. Collagen cross-linking requires adequate amounts of vitamins A and C, iron, and copper. Vitamin C, iron, and zinc are important for developing tensile strength during the maturation phase of wound healing.
Healing depends on a regular supply of oxygen. For example, oxygen is critical for leukocytes to destroy bacteria and fibroblasts to stimulate collagen synthesis. If the supply is hindered by poor blood flow to the area of the wound or if the patient’s ability to take in adequate oxygen is impaired, the result is the same—impaired healing.
Possible causes of inadequate blood flow to the area of the wound include pressure, arterial occlusion, or prolonged vasoconstriction, possibly associated with such medical conditions as peripheral vascular disease and atherosclerosis. Possible causes of a lower than systemic blood oxygenation include:
Inadequate oxygen intake
Hypothermia or hyperthermia
Anemia
Alkalemia
Other medical conditions such as chronic obstructive pulmonary disease.
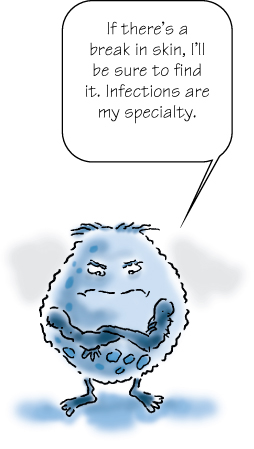
An infection can affect wound healing or be a complication of the healing process. Infection can be systemic or localized in the wound. A systemic infection, such as pneumonia or tuberculosis, increases the patient’s metabolism and thus consumes the fluids, nutrients, and oxygen the body needs for healing.
A localized infection in the wound itself is more common. Remember, any break in the skin allows bacteria to enter. The infection may occur as part of the injury or may develop later in the healing process. For example, when the inflammatory phase lingers, wound healing is delayed and metabolic by-products of bacterial ingestion accumulate in the wound. This buildup interferes with the formation of new blood vessels and the synthesis of collagen. Infection can also occur in a wound that has been healing normally. This situation happens especially in larger wounds involving extensive tissue damage. New or increased pain, redness, heat, and drainage are signs of a new infection. In any case, healing can’t progress until the cause of infection is addressed.
In patients in long-term care facilities, infection may result from fecal contamination. Fecal incontinence affects 20% of long-term care patients and is associated with increased mortality. Typically, those affected are patients with poorer overall health.
Skin changes that occur with aging cause a prolonged healing time in elderly patients. Although delayed healing is partially due to physiologic changes, it’s also complicated by other problems associated with aging, such as poor nutrition and hydration, the presence of a chronic condition, and the use of multiple medications.
| Ages and Stages |
| Effects of aging on wound healing These factors impede wound healing in older adults:
|
Respiratory problems, atherosclerosis, diabetes, and malignancies can increase the risk of wounds and interfere with wound healing. These conditions can interfere with systemic and peripheral oxygenation and nutrition, which affect healing.
Impaired circulation, a common problem for patients with diabetes and other disorders, can cause tissue hypoxia (lack of oxygen). Neuropathy associated with diabetes reduces ability to sense pressure. As a result, patients with diabetes may experience trauma, especially to the feet, without realizing it. Insulin dependency can impair leukocyte function, which adversely affects cell proliferation.
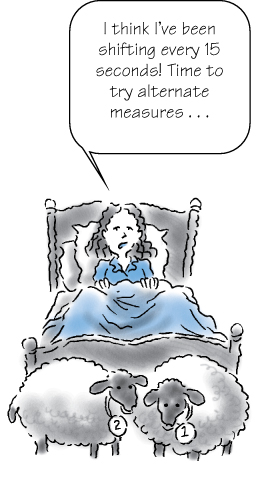
Hemiplegia and quadriplegia involve the breakdown of muscle tissue and reduction in the padding around the large bones of the lower body. Because a patient with one of these conditions lacks sensation, he’s at risk for developing chronic pressure ulcers.
Normally, a healthy person shifts position every 15 minutes or so, even during sleep. This shifting prevents tissue damage due to ischemia. Anything that impairs the ability to sense pressure, including spinal cord lesions, the use of pain medications, and cognitive impairment, puts the patient at risk (because the patient can’t feel the growing discomfort of pressure and respond to it).
Other conditions that can delay healing include dehydration, end-stage renal disease, liver disease, thyroid disease, heart failure, peripheral vascular disease, and vasculitis and other collagen vascular disorders.
Any medication that reduces a patient’s movement, circulation, or metabolic function, such as sedatives and tranquilizers, has the potential to inhibit the patient’s ability to sense and respond to pressure. Also, because movement promotes adequate oxygenation, lack of motion means that peripheral blood delivers less oxygen to the extremities than it should. This decrease in oxygen is especially problematic for older adults. Remember, oxygen is important; without it, the healing process slows and the potential for complications rises.
Some medications, such as steroids and chemotherapeutic agents, reduce the body’s ability to mount an appropriate inflammatory response. This reduction in response interrupts the inflammatory phase of healing and can dramatically lengthen healing time, especially in a patient with a compromised immune system such as one with AIDS. The use of antibiotics for long periods may place the patient at greater risk for developing an infection, which can affect wound healing.
Carbon monoxide, a component of cigarette smoke, binds to the hemoglobin in blood in the place of oxygen. This binding significantly reduces the amount of oxygen circulating in the bloodstream, which can impede wound healing. To some extent, this reaction also occurs in people regularly exposed to secondhand smoke.
The most common complications associated with wound healing are:
Hemorrhage
Dehiscence and evisceration
Infection
Fistula formation.
Internal hemorrhage (bleeding) can result in the formation of a hematoma—a blood clot that solidifies to form a hard lump under the skin. Hematomas are commonly found around bruises.
External hemorrhage is visible bleeding from the wound. External bleeding during healing isn’t unusual because the newly developed blood vessels are fragile and rupture easily. This is one reason a wound needs to be protected by a dressing. However, each time the new blood vessels suffer damage, healing is delayed while repairs are made.
Dehiscence is a separation of skin and tissue layers. It’s most likely to occur 3 to 11 days after the injury was sustained and may follow surgery. Evisceration is similar but involves protrusion of underlying visceral organs as well.
Recognizing dehiscence and eviscerationIn wound dehiscence (top), the layers of a wound separate. In evisceration (bottom), the viscera (in this case, a bowel loop) protrude through the wound.
| Wound dehiscence
|

| Evisceration of bowel loop
|

Dehiscence and evisceration may constitute a surgical emergency, especially if they involve an abdominal wound. If a wound opens without evisceration, it may need to heal by secondary intention. Poor nutrition and advanced age are two factors that increase a patient’s risk of dehiscence and evisceration.
Infection is a relatively common complication of wound healing that should be addressed promptly. Infection can lead to a bacterial infection that spreads to surrounding tissue. Signs that infection may be at work include:
Redness and warmth of the margins and tissue around the wound
Fever
Edema
Pain (or a sudden increase in pain)
Pus
Increase in exudate or a change in its color
Odor
Discoloration of granulation tissue
Further wound breakdown or lack of progress toward healing.
A fistula is an abnormal passage between two organs or between an organ and the skin. In a wound, it may appear as undermining or a sinus tract (tunneling) in the skin around the wound. If a sinus tract is present, it’s important to determine its extent and direction.
The words you choose to describe your observations of a specific wound have to communicate the same meaning to other members of the health care team, insurance companies, regulators, the patient’s family and, ultimately, the patient himself. This is a tall order when you consider that even wound care experts debate the descriptive phrases they use. Slough or eschar? Undermining or tunneling? How much drainage is moderate? Is the color green or yellow? Does the drainage have an odor?

The best way to classify wounds is to use the basic system described here, which focuses on three categories of fundamental characteristics:
 Wound age
 Wound depth (extent of tissue loss)
 Wound color
When determining the age of a wound, you need to first determine if the wound is acute or chronic. However, this determination can present a problem if you adhere solely to a time line. For instance, just how long is it before an acute wound becomes a chronic wound?
Rather than base your determination solely on time, consider a wound an acute wound if it’s new or making progress as expected and a chronic wound any wound that isn’t healing in a timely fashion. The main idea is that, in a chronic wound, healing has slowed or stopped and the wound is no longer getting smaller and shallower. Even if the wound bed appears healthy, red, and moist, if healing fails to progress, consider it a chronic wound.
Chronic wounds don’t heal as easily as acute wounds. The drainage in chronic wounds contains a greater amount of destructive enzymes, and fibroblasts—the cells that function as the architects in wound healing—seem to lose their “oomph.” They’re less effective at producing collagen, divide less often, and send fewer signals to other cells telling them to divide and fill the wound. In other words, the wound changes from one that’s vigorous and ready to heal, to one that’s downright lazy!
Wound depth is another fundamental characteristic used to classify wounds. In your assessment, record wound depth as partial thickness or full thickness.
Wounds are classified as partial thickness or full thickness according to the depth of the wound. Partial-thickness wounds involve only the epidermis or extend into the dermis but not through it. Full-thickness wounds extend through the dermis into tissues beneath and may expose adipose tissue, muscle, or bone. These diagrams illustrate the relative depth of both classifications.

Partial-thickness wounds normally heal very quickly because they involve only the epidermal layer of the skin or extend through the epidermis into (but not through) the dermis. The dermis remains at least partially intact to generate the new epidermis needed to close the wound. Partial-thickness wounds are also less susceptible to infection because part of the body’s first level of defense (the skin) is still intact. These wounds tend to be painful, however, and need protection from the air to reduce pain and decrease the risk of infection.
Full-thickness wounds penetrate completely through the skin into underlying tissues. The wound may expose adipose tissue (fat), muscle, tendon, or bone. In the abdomen, you may see adipose tissue or omentum (the covering of the bowel). If the omentum is penetrated, the bowel may protrude through the wound (evisceration). Granulation tissue may be visible if the wound has started to heal.
Full-thickness wounds heal by granulation and contraction, which require more body resources and more time than the healing of partial-thickness wounds. When assessing a full-thickness wound, report the depth as well as the length and width of the wound.
In the case of pressure ulcers, wound depth allows you to stage the ulcer according to the classification system developed by the National Pressure Ulcer Advisory Panel (NPUAP).
Wounds are also classified by the color of the wound bed. Wound color helps the wound care team determine whether debridement is appropriate.
With any wound, you can promote healing by keeping the wound moist, clean, and free from debris. For open wounds, using wound color can guide the specific management approach to aid healing.
|
Be picky about wound bed color! Only red will do, and the best shade is red—not pale pink or grayish red. There are literally thousands of words to describe colors; however, you can simplify your assessment by sticking to the red-yellow-black classification system. This system is a useful tool for developing effective wound care management plans.
If the wound bed is red (the color of healthy granulation tissue), the wound is healthy and normal healing is under way. When a wound begins to heal, a layer of pale pink granulation tissue covers the wound bed. As this layer thickens, it becomes red.
If the wound bed is yellow, beware! A yellow color in the wound bed may be a film of fibrin on the tissue. Fibrin is a sticky substance that normally acts as glue in tissue rebuilding. However, if the wound is unhealthy or too dry, fibrin builds up into a layer that can’t be rinsed off and may require debridement. Tissue that has recently died due to ischemia or infection may also be yellow and must be debrided. Necrotic tissue in a wound bed that is yellow, gray, green, or tan; is adherent to the wound bed; and is dry or moist, is usually identified as slough.
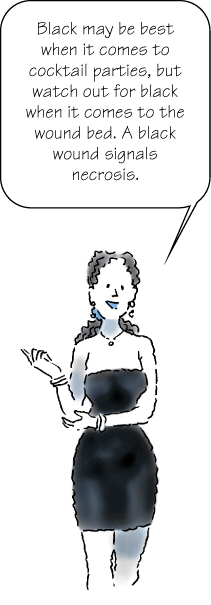
If the wound bed is black, be alarmed. A black wound bed signals necrosis (tissue death). Eschar (dead, avascular tissue) covers the wound, slowing the healing process and providing microorganisms with a site in which to proliferate. When eschar covers a wound, accurate assessment of wound depth is difficult and should be deferred until eschar is removed.
Typically, debridement is indicated for black wounds; however, ulcers caused by ischemia (damage due to inadequate blood supply) and uninfected heel pressure ulcers are exceptions. Ischemic wounds won’t heal until blood supply is improved, and they’re less likely to become infected if kept dry. The wound can be debrided and kept moist after blood supply is reestablished. (The body can then fend off infection and heal the wound.)
If you note two or even all three colors in a wound, classify the wound according to the least healthy color present. For example, if your patient’s wound appears both red and yellow, classify it as a yellow wound.
Gathering information about a wound requires you to use almost all of your senses. Be sure to assess drainage, the wound bed, and patient pain. Assess the wound bed and the surrounding skin only after they’ve been cleaned. As you perform your assessment, remember that it doesn’t matter what method you use to record your observations, it’s just important to be consistent.
As you assess the wound, record information about:
|
Okay, we already talked about the last item, extent of tissue loss. Now, let’s move on to the next assessment parameter.
Identifying the location of the wound is important because location can assist you in determining the etiology of the wound. Is it a pressure point, on the lower extremity, in the gluteal cleft, on the bottom of the foot? All of these locations suggest etiology.
The most common method of measuring wound dimensions is to use a tape measure. Make sure it’s a disposable device to prevent contamination and cross-contamination. Record the length of the wound at the longest point in a head to toe direction and record the width as the longest measurement perpendicular (at a right angle) to your length measurement.
When measuring a wound, first determine the longest distance across the open area of the wound—in a head to toe direction. In this photograph, note the line used to illustrate this length.
A wound’s width is simply the longest distance across the wound at a right angle to the length. Note the relationship of length and width in the photograph. Also, note the area of reddened, intact skin and white macerated skin. These areas would be measured and recorded as surrounding erythema and maceration—not as part of the wound itself. In this full-thickness ischial pressure ulcer, you would also record a depth and note areas of tunneling or undermining.

Be sure to record any observed areas of discoloration of the intact skin around the wound opening separately—not as part of the wound bed. Record all measurements in centimeters.

Another way to measure the wound is to use wound tracing (in which wound margins are traced on a sheet of clear plastic). You use the tracing to calculate an approximate wound area. This method provides only a rough estimate but is simple and fairly quick.
Photography may be used to document wound progress but has Health Insurance Portability and Accountability Act (HIPAA) and Health Information Technology for Clinical and Economic Health (HITECH) Act implications. Obtaining informed consent and maintaining safe storage of the photographs are required.
To measure the depth of the wound, you’ll need a cotton-tipped swab. Gently insert the cotton-tipped swab into the deepest portion of the wound and then carefully mark the probe where it meets the edge of the skin. Remove the applicator and measure the distance from your mark to the end to determine depth.
It’s also important to measure tunneling, or sinus tracts (extensions of the wound bed into adjacent tissue), and undermining (areas of the wound bed that extend under the skin). Measure these features just as you would the depth. Carefully insert a cotton-tipped swab to the bottom of the tunnel or to the end of the undermined area; then mark the stick and measure the distance from your mark to the end of the swab. If a tunnel is large, palpate it with a gloved finger rather than a swab because you can sense the end of the tunnel better with your finger.

The type of tissue in the ulcer base determines the potential for healing and the type of treatment. Know how to identify necrotic tissue, granulation tissue, and epithelial tissue.
Necrotic tissue may appear as a moist yellow or gray area of tissue that’s separating from viable tissue. When dry, necrotic tissue appears as thick, hard, and leathery black eschar. Slough tissue appears as yellow/tan/gray tissue and is dry or moist, may be adherent or stringy in the base of the wound. Areas of necrotic or devitalized tissue may mask underlying abscesses and collections of fluid. Before the ulcer can begin to heal, necrotic tissue, drainage, and metabolic wastes must be removed from the wound.
Granulation tissue appears as beefy red, bumpy, shiny tissue in the base of the ulcer. As it heals, a full-thickness ulcer develops more and more granulation tissue. Such factors as tissue oxygenation, tissue hydration, and nutrition can alter the color and quality of granulation tissue.
A wound that is red is healthy, but if you touch the wound and it bleeds easily (tissue is friable), this usually indicates excess bacteria (a bioburden) in the wound. Bioburden is not “infection” but an over-colonization of bacteria in the wound bed and can often be treated with topical antimicrobials.
Epithelialization is the regeneration of epidermis across the ulcer surface. It appears as pale or dark pink skin, first becoming evident at ulcer borders in full-thickness wounds and as islands around hair follicles in partial-thickness wounds. Wound healing can be assessed and quantified by the percentage of surface covered by new epithelium.
Edges should be attached, moist, even, or flushed with wound base to enhance epithelialization. Premature “closure” of wound edge may be identified by rolled edges (epibole) and/or dry and thickened edges.
When assessing wound edges, you’ll want to see skin that’s smooth—not rolled—and tightly adherent to the wound bed. Rolled skin may indicate that the wound bed is too dry. Loose skin at the edges may indicate additional shearing injury (separation of skin layers), possibly due to a rough transfer or repositioning. In this case, improve transfer and repositioning techniques to prevent recurrence.
In the past, sailors used the color of the sky to predict danger at sea. In a similar fashion, the color of the skin around the wound can alert you to impending problems that can impede healing:
White skin indicates maceration, or too much moisture, and signals the need for a protective barrier around the wound and a more absorbent dressing (plus keep the dressing in the wound and off the skin).
Red skin can indicate inflammation, injury (e.g., tape burn, excessive pressure, or chemical exposure), or infection. Remember that inflammation is healthy only during the inflammatory phase of healing—not after!
Purple skin can indicate bruising, one sign of trauma.
Your fingers are invaluable tools you may be taking for granted. During your assessment of the area around the wound, your fingers will tell you much. For example, gently probe the tissue around the wound bed to determine if it’s soft or hard (indurated). Indurated tissue, even in the absence of erythema (redness), is one indication of infection.
Similarly, if your patient has dark skin, it may be impossible to see color cues. Again, your fingers can help. Probe the area around the wound bed and compare the feel with surrounding healthy skin. A tender area of skin that appears shiny and feels hard may indicate inflammation in such a patient.

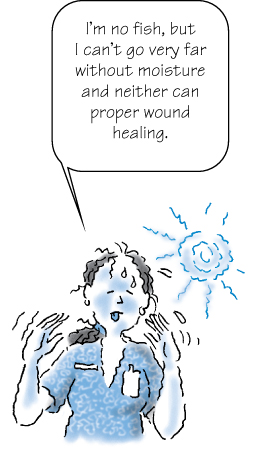
The wound bed should be moist but not overly moist. Moisture allows the cells and chemicals needed for healing to move about the wound surface.
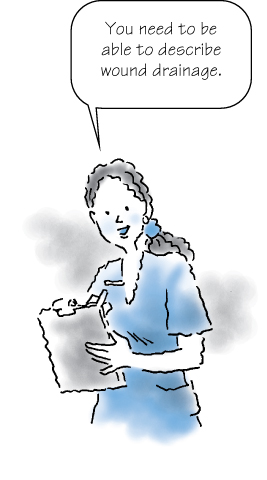
To begin collecting information about wound drainage, inspect the dressing as you remove it and record answers to such questions as:
Is the drainage well contained, or is it oozing from the edges? If it’s oozing, consider using a more absorbent dressing.
In the case of an occlusive dressing, were the dressing edges well sealed? (A hydrocolloid in the gluteal cleft area becomes a greenhouse for bacteria if the edges are loose.) If the patient has fecal incontinence, it’s even more important to note the seal status.
Is the dressing saturated or dry?
How much drainage is there: a scant, moderate, or large amount? Is there an odor?
What are the color and consistency of the drainage?
This chart provides terminology that you can use to describe the color and consistency of wound drainage.
|
Also consider the texture of the drainage. If the drainage has a thick, creamy texture, the wound contains an excessive amount of bacteria. However, this doesn’t necessarily mean a clinically significant infection is present. Document the characteristics of the drainage. Drainage might be creamy because it contains WBCs that have killed bacteria. The drainage is also contaminated with surface bacteria that naturally live in moist environments on the human body.
Because of this bacterial colonization, swab cultures are not the best way to identify wound infections. Nonetheless, some doctors still order swab cultures because they’re easy to collect and inexpensive.
The Levine method is a suggested method:
Cleanse wound with normal saline solution (NSS) and blot dry with sterile gauze.
Identify a healthy area of wound about 1 cm2.
Moisten the swab with nonpreserved NSS.
Press on the wound area, rotating the swab (apply enough pressure to elicit tissue fluid).
When tip of swab is saturated, break the tip (if needed) and insert into container using sterile technique.
Punch biopsy of tissue or needle aspiration of fluid may also be used. These methods require more skill but are more likely to reveal accurate results.
In dry wound beds, cells involved in healing, which normally exist in a fluid environment, are a bit like fish in a desert—they can’t move. WBCs can’t fight infection, enzymes like collagenase can’t break down dead material, and macrophages can’t carry away debris. The wound edges curl up to preserve moisture remaining in the edge and epithelial cells (new skin cells) fail to grow over and cover the wound. Healing grinds to a halt and necrotic tissue builds up.
Too much moisture poses a different problem. It floods the wound and spills out onto the skin, where the constant moisture causes the death of skin cells.
If kept clean, a noninfected wound usually produces little, if any, odor. (One exception is the odor normally present under a hydrocolloid dressing that develops as a by-product of the degradation process.) A newly detected odor might be a sign of infection; record it in your findings and report it to the doctor. When documenting wound odor, it’s important to include when the odor was noted and whether it went away with wound cleaning.
If an odor develops, it can present an embarrassing or otherwise uncomfortable situation for the patient as well as his family, guests, and roommate. If you notice an odor, or if your patient says he notices one, use an odor eliminator. Odor eliminators differ from air fresheners in that they aren’t scents that mask odors but rather compounds that bind with, and neutralize, the molecules responsible for the odor.
In addition to the wound characteristics, we always need to be assessing pain. You’ll want to note not only pain associated with the injury itself but also pain associated with healing and with therapies employed to promote healing. To fully understand your patient’s pain, talk with him and ask about the level of pain on a scale of 0 to 10, with 10 being the worst pain he has ever experienced. Then watch to see how he responds to pain and the therapies provided. As always, remember to record your findings.
If your patient is conscious and can communicate, have him rate his pain before and during each dressing change. If your notes reveal that his pain is higher before the dressing change, it may indicate an impending infection, even before any other signs appear.
If your patient says the dressing change itself is painful, you might consider administering pain medication before the procedure or changing the dressing technique. However, remember to document this pain and report it to the doctor. Less painful methods of removing dead tissue exist but, if the patient’s pain isn’t documented and communicated, wet-to-dry debridement orders may stand and the patient may suffer unnecessary discomfort.
In general, when removing adherent dressings, it’s less painful if you soak the dressing or, over intact skin, use an adhesive remover. Also, keep the skin taut. Press down on the skin to release the dressing rather than just pulling the dressing off. Pull the dressing gently toward the wound using your index finger to gently release the skin from the adhesive.
Treating impaired skin integrity involves a range of procedures, from basic wound care and wound irrigation to surgical wound management and closed wound drain management.
Basic wound care centers on cleaning and dressing the wound. Because open wounds are colonized (or contaminated) with bacteria, practice clean technique using clean, nonsterile gloves during wound care unless sterile dressing changes are specified. Always follow standard precautions.
The goal of wound cleaning is to remove debris and contaminants from the wound without damaging healthy tissue. The wound should be cleaned initially; repeat cleaning as needed and always before a new dressing is applied.
The basic purpose of a dressing, to provide an optimal environment in which the body can heal itself, should be considered before one is selected. Functions of a wound dressing include:
Protecting the wound from contamination and trauma
Providing compression if bleeding or swelling is anticipated
Applying medications
Absorbing drainage or debrided necrotic tissue
Filling the “dead space” in the wound
Protecting the skin surrounding the wound.
The cardinal rule is to keep moist tissue moist and the surrounding skin dry. Ideally, a dressing should keep the wound moist, absorb drainage or debris, conform to the wound, and be adhesive to surrounding skin yet be easily removable. It should also be user-friendly, require minimal changes, decrease the need for a secondary dressing layer, and be cost-effective and comfortable for the patient.
Hypoallergenic tape or elastic netting  overbed table
  piston-type irrigating system
  two pairs of gloves
  cleaning solution (such as NSS) as ordered
  sterile 4″ × 4″ gauze pads
  selected topical dressing
  linen-saver pads
  impervious plastic trash
  bag disposable wound-measuring device
Assemble the equipment at the patient’s bedside. Use clean or sterile technique, depending on facility policy and wound care orders.
Cut tape into strips for securing dressings. Loosen lids on cleaning solutions and medications for easy removal.
Attach an impervious plastic trash bag to the overbed table to hold used dressings and refuse.
Before any dressing change, wash your hands and review the principles of standard precautions.
Provide privacy, and explain the procedure to the patient to allay fears and promote cooperation.
Position the patient in a way that maximizes comfort while allowing easy access to the wound site.
Cover bed linens with a linen-saver pad to prevent soiling.
Open the cleaning solution container and carefully pour cleaning solution onto the opened plastic package of 4 × 4s or into a bowl to avoid splashing. (The bowl may be clean or sterile, depending on facility policy).
Open other supplies as needed.
Put on gloves.
Gently roll or lift an edge of the soiled dressing to obtain a starting point. Support adjacent skin while gently releasing the soiled dressing from the skin. When possible, remove the dressing in the direction of hair growth. Assess the existing dressing for drainage, color, amount, and odor.
Discard the soiled dressing and your contaminated gloves in the impervious plastic trash bag to avoid contaminating the clean or sterile field.
Put on a clean pair of gloves (sterile or nonsterile, depending on facility policy or the wound care order).
Inspect the wound. Note the color, amount, and odor of drainage and necrotic debris.
Fold a sterile 4″ × 4″ gauze pad into quarters and grasp it with your fingers. Make sure the folded edge faces outward.
Alternatively, use a wound cleanser in a spray-gun bottle.
When cleaning, be sure to move from the least-contaminated area to the most-contaminated area. For a linear-shaped wound, such as an incision, gently wipe from top to bottom in one motion, starting directly over the wound and moving outward. For an open wound, such as a pressure ulcer, gently wipe in concentric circles, again starting directly over the wound and moving outward. Use a separate gauze pad each time the wound is cleaned.
Discard the gauze pad in the plastic trash bag.
Using a clean gauze pad for each wiping motion, repeat the procedure until you’ve cleaned the entire wound.
Dry the wound with 4″ × 4″ gauze pads, using the same procedure as for cleaning. Discard the used gauze pads in the plastic trash bag.
Measure the perimeter of the wound with a disposable wound-measuring device (e.g., a square, transparent card with concentric circles arranged in bull’s-eye fashion and bordered with a straight-edge ruler). Measure the longest length in a head to toe direction and the widest width.
Measure the depth of a full-thickness wound.
Gently probe the wound bed and edges with your finger or a flexible probe to assess for wound tunneling or undermining. Tunneling usually signals wound extension along fascial planes. Gauge tunnel depth by determining how far you can insert your finger or the cotton-tipped applicator.
Next, reassess the condition of the skin and wound. Note the character of the clean wound bed and the surrounding skin.
If you observe adherent necrotic material, notify a wound care specialist or a doctor to ensure appropriate debridement.
Prepare to apply the appropriate topical dressing if ordered. Instructions for applying topical moist saline gauze, hydrocolloid, transparent, alginate, foam, and hydrogel dressings follow. For other dressings or topical agents, follow your facility’s protocol or the manufacturer’s instructions.
The patient’s needs and wound characteristics determine which type of dressing to use on a wound. Think of dressings as maintaining moisture, donating moisture, or absorbing moisture.
| Maintaining moisture |
| Gauze dressings |
| Made of absorptive cotton or synthetic fabric, gauze dressings are permeable to water, water vapor, and oxygen and may be impregnated with hydrogel or another agent. When uncertain about which dressing to use, you may apply a gauze dressing moistened in saline solution until a wound specialist recommends definitive treatment. |
| Hydrocolloid dressings |
| Hydrocolloid dressings are adhesive, moldable wafers made of a carbohydrate-based material and usually have waterproof backings. They’re impermeable to oxygen, water, and water vapor, and most have some absorptive properties. |
| Transparent film dressings |
| Transparent film dressings are clear, adherent, and nonabsorptive. These polymer-based dressings are permeable to oxygen and water vapor but not to water. Their transparency allows visual inspection. Because they can’t absorb drainage, they’re used on partial-thickness wounds with minimal exudate. |
| Absorbing moisture |
| Alginate dressings |
| Made from seaweed, alginate dressings are nonwoven, absorptive dressings available as soft sterile pads or ropes. They absorb excessive exudate and may be used on infected wounds. As these dressings absorb exudate, many turn into a gel that keeps the wound bed moist and promotes healing. When exudate is no longer excessive, switch to another type of dressing. |
| Hydrofiber |
| These dressings are made of synthetic material and resemble alginates in shape, size, and absorbency. They absorb excessive exudate and may be used on infected wounds. |
| Foam dressings |
| Foam dressings are spongelike polymer dressings that may be impregnated or coated with other materials. Foams are adhesive or nonadhesive and bordered or nonbordered and are used when absorption is needed. |
| Donating moisture |
| Hydrogel dressings |
| Most hydrogels are primarily water-based. They’re available as a gel in a tube, as flexible sheets, gel impregnated gauze pads, and as saturated gauze packing strips. They may have a cooling effect, which eases pain, and are used when the wound needs moisture. |
Moisten the gauze dressing with NSS. Wring out excess fluid.
Open the gauze pad completely (often termed fluffing) and gently place the dressing into the wound. To separate surfaces within the wound, gently guide the gauze between opposing wound surfaces. To avoid damage to tissues, lightly fill the space—don’t pack the gauze tightly.
To protect the surrounding skin from moisture, apply a sealant or barrier.
Change the dressing often enough to keep the wound moist.
Choose a clean, dry, presized dressing, or cut one to overlap the wound by about 1″ (2.5 cm). Remove the dressing from its package, pull the release paper from the adherent side of the dressing, and apply the dressing to the wound. Hold the dressing in place with your hand because the warmth will mold the dressing to the skin.
As you apply the dressing, carefully smooth out wrinkles and avoid stretching the dressing.
If the dressing’s edges need to be secured with tape, apply a skin sealant to the intact skin around the wound. After the area is dry, tape the dressing to the skin. The sealant protects the skin from tape burns and skin stripping and promotes tape adherence. Avoid using tension or pressure when applying the tape.
Remove your gloves and discard them in the impervious plastic trash bag. Dispose of refuse according to facility policy, and wash your hands.
Change a hydrocolloid dressing every 2 to 7 days as necessary; change it immediately if the patient complains of pain, the dressing no longer adheres, or leakage occurs. Remember, hydrocolloids are occlusive and provide a barrier when intact. If drainage is leaking out, then bacteria can go in!
Clean and dry the wound as described earlier.
Select a dressing to overlap the wound by 1″ to 2″ (2.5 to 5 cm).
Gently lay the dressing over the wound; avoid wrinkling the dressing. To prevent shearing force, don’t stretch the dressing over the wound. Press firmly on the edges of the dressing to promote adherence. Although this type of dressing is self-adhesive, you may have to tape the edges to prevent them from curling.
Change the dressing every 3 to 5 days, depending on the amount of drainage. If the seal is no longer secure or if accumulated tissue fluid extends beyond the edges of the wound and onto the surrounding skin, change the dressing. Occlusive dressings that are no longer secure or that are leaking on to the surrounding skin may cause a risk for infection or skin breakdown. The dressing should be monitored for dryness, intactness, and that it is secure.
Apply the alginate or hydrofiber dressing to the wound surface. Cover the area with a secondary dressing (such as gauze pads or transparent film) as ordered. Secure the dressing with tape or elastic netting.
Change the dressing when strikethrough occurs (you can see the drainage outline on the secondary dressing). This means the alginate/hydrofiber has absorbed the maximum amount. When the drainage stops or the wound bed looks dry, stop using alginate/hydrofiber dressings.
Gently lay the foam dressing over the wound. But, if the wound is deep, then the dead space is not filled. Sometimes, foams are secondary dressings.
Use tape, elastic netting, or gauze to hold the dressing in place if it is not bordered or adhesive.
Change the dressing when the foam no longer absorbs the exudate and there is strikethrough on the top or edges of the dressing.
Apply gel to the wound bed to cover the bed with a layer of gel.
Cover partial thickness wounds with a secondary dressing (transparent film or a nonadherent dressing). For full-thickness wounds, use gel-impregnated gauze (4 × 4s or strip). If you do not have this available, apply gel over the wound bed and fill the dead space with fluffed, NSS moistened gauze.
Change the dressing daily or as needed to keep the wound bed moist.
If the hydrogel dressing you select comes in sheet form, cut the dressing to overlap the wound by 1″ (2.5 cm); then apply as you would a hydrocolloid dressing. Don’t forget to protect the periwound skin with skin prep!
Be aware that infection may cause foul-smelling drainage, persistent pain, severe erythema, induration, and elevated skin and body temperatures. Advancing infection or cellulitis can lead to septicemia.
Severe erythema may signal worsening cellulitis, which means the offending organisms have invaded the tissue and are no longer localized.
Irrigation cleans tissues and flushes cell debris and drainage from an open wound. It also helps prevent premature surface healing over an abscess pocket or infected tract.
After irrigation, fill open wounds to absorb additional drainage. Always follow the standard precaution guidelines of the Centers for Disease Control and Prevention (CDC).
Waterproof trash bag  linen-saver pad
  emesis basin
  clean gloves
  sterile gloves
  goggles
  gown, if indicated
  prescribed irrigant such as sterile NSS
  sterile water or NSS
  soft rubber or plastic catheter
  sterile container
  materials as needed for wound care
  sterile irrigation and dressing set
  commercial wound cleaner
  35-ml piston syringe with 19G needle or catheter
  skin protectant wipe (skin sealant) or other protective skin barrier

Assemble equipment in the patient’s room. Check the expiration date on each sterile package and inspect for tears.
Don’t use any nonpreserved solution that has been open longer than 24 hours. As needed, dilute the prescribed irrigant to the correct proportions with sterile water or NSS. Allow the solution to reach room temperature, or warm it to 90° to 95° F (32.2° to 35° C).
Open the waterproof trash bag and place it near the patient’s bed. Form a cuff by turning down the top of the trash bag.
Check the doctor’s order, assess the patient’s condition, and identify allergies. Explain the procedure to the patient, provide privacy, and position the patient correctly for the procedure. Place the linen-saver pad under the patient and place the emesis basin below the wound so that the irrigating solution flows from the wound into the basin.
Wash your hands, and put on a gown and gloves.
Remove the soiled dressing; then discard the dressing and gloves in the trash bag.
Establish a clean or sterile field with all the equipment and supplies you’ll need for wound irrigation and dressing. Pour the prescribed amount of irrigating solution into a clean or sterile container. Put on sterile gloves and a gown and goggles, if indicated.
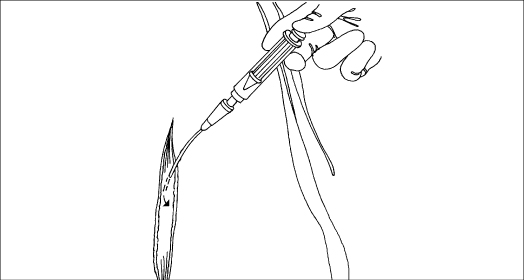
When preparing to irrigate a wound, attach a 19G needle or catheter to a 35-ml piston syringe. This setup delivers an irrigation pressure of 8 psi, which is effective in cleaning the wound and reducing the risk of trauma and wound infection. To prevent tissue damage or, in an abdominal wound, intestinal perforation, avoid forcing the needle or catheter into the wound.
Irrigate the wound with gentle pressure until you have administered the prescribed amount and the solution returns clear. Allow the emesis basin to remain under the wound to collect any remaining drainage.
A syringe irrigation is another alternative. Where possible, direct the flow at right angle to the wound and allow the fluid to drain by gravity. Doing so requires careful positioning of the patient, either in bed or on a chair. The patient may need analgesia during the treatment.
If irrigation isn’t possible, gently swab away exudate before using antiseptic or saline solution to clean the wound (taking care not to push loose debris into the wound). Facility policy permitting, use sharp, sterile scissors to snip off loose dead tissue—never pull it off.
Fill the syringe with the irrigating solution and connect the catheter to the syringe. Gently instill a slow, steady stream of solution into the wound until the syringe empties. Make sure the solution flows from the clean to the dirty area of the wound to prevent contamination of clean tissue by exudate. Also make sure the solution reaches all areas of the wound.
Refill the syringe, reconnect it to the catheter, and repeat the irrigation. Continue to irrigate the wound until you’ve administered the prescribed amount of solution or until the solution returns clear. Note the amount of solution administered. Then remove and discard the catheter and syringe in the waterproof trash bag.
Keep the patient positioned to allow further wound drainage into the basin.
Clean the area around the wound with NSS and pat dry with gauze; wipe intact surrounding skin with a skin protectant wipe and allow it to dry.
Fill the wound lightly if ordered, and apply a dressing.
Remove and discard your gloves and gown.
Make sure the patient is comfortable and wash your hands.
Dispose of drainage, solutions, trash bag, and soiled equipment and supplies according to facility policy and CDC guidelines.
Try to coordinate wound irrigation with the doctor’s visit so that he can inspect the wound.
Irrigate with a bulb syringe if the wound is small or not particularly deep or if a piston syringe is unavailable. However, use a bulb syringe cautiously because this type of syringe doesn’t deliver enough pressure to adequately clean the wound and may increase the risk of aspirating drainage.
When caring for a surgical wound, you carry out procedures that help prevent infection by stopping pathogens from entering the wound. In addition to promoting patient comfort, such procedures protect the skin’s surface from maceration and excoriation caused by contact with irritating drainage. They also allow you to measure wound drainage to monitor fluid and electrolyte balance.
The primary method used to manage a draining surgical wound is a dressing, negative pressure wound therapy, or a pouch. Usually, lightly seeping wounds with drains and wounds with minimal purulent drainage can be managed with dressings.
Dressing a surgical wound calls for sterile technique and sterile supplies to prevent contamination. You may use the color of the wound to help determine which type of dressing to apply. Be sure to change the dressing often enough to keep the skin dry. Always follow standard precautions set by the CDC.
Waterproof trash bag  clean gloves
  sterile gloves
  gown and face shield or goggles, if indicated
  sterile 4″ × 4″ gauze pads
  selected primary dressing(s)
  sterile cotton-tipped applicators
  sterile dressing set
  topical medication, if ordered
  selected securing (adhesive or other tape, Montgomery straps, a fishnet tube elasticized dressing support, or a T-binder)
  skin protectant
  sterile NSS
  optional: forceps, nonadherent pads, collodion spray or acetone-free adhesive remover, graduated container.
Sterile scissors  sterile 4″ × 4″ gauze pads without cotton lining
  ostomy pouch or another collection pouch
  sterile precut tracheostomy pads or drain dressings
  adhesive tape (paper or silk tape if the patient is hypersensitive)
  surgical mask
Ask the patient about allergies to tapes and dressings. Assemble all equipment in the patient’s room. Check the expiration date on each sterile package, and inspect for tears.
Open the waterproof trash bag, and place it near the patient’s bed. Position the bag to avoid reaching across the sterile field or the wound when disposing of soiled articles. Form a cuff by turning down the top of the trash bag to provide a wide opening and to prevent contamination of instruments or gloves by touching the bag’s edge.
Explain the procedure to the patient to allay his fears and ensure his cooperation.
Check the doctor’s order for specific wound care and medication instructions. Note the location of surgical drains to avoid dislodging them during the procedure.
Assess the patient’s condition.
Provide privacy, and position the patient as necessary. To avoid chilling him, expose only the wound site.
Wash your hands thoroughly. Put on a gown and a face shield, if necessary. Then put on clean gloves.
Loosen the soiled dressing by holding the patient’s skin and pulling the tape or dressing toward the wound to protect the newly formed tissue and prevent stress on the incision. Moisten the tape with acetone-free adhesive remover, if necessary, to make the tape removal less painful (particularly if the skin is hairy). Don’t apply solvents to the incision because they could contaminate the wound.
Slowly remove the soiled dressing. If the gauze adheres to the wound, loosen the gauze by moistening it with sterile NSS.
Observe the dressing for the amount, type, color, and odor of drainage.
Discard the dressing and gloves in the waterproof trash bag.
Wash your hands. Establish a sterile field with all the equipment and supplies you’ll need for suture line care and the dressing change. If the doctor has ordered ointment, squeeze the needed amount onto the sterile field. If you’re using an antiseptic from an unsterile bottle, pour the antiseptic cleaning agent into a sterile container so you won’t contaminate your gloves. Then put on sterile gloves.
Saturate the sterile gauze pads with the prescribed cleaning agent. Avoid using cotton balls because they may shed fibers in the wound, causing irritation, infection, or adhesion.
If ordered, obtain a wound culture; then proceed to clean the wound.
Irrigate the wound, if ordered, using the specified solution.
Pick up the moistened gauze pad or swab, and squeeze out the excess solution.
Working from the top of the incision, wipe once to the bottom and then discard the gauze pad. With a second moistened pad, wipe from top to bottom in a vertical path next to the incision (as shown below).
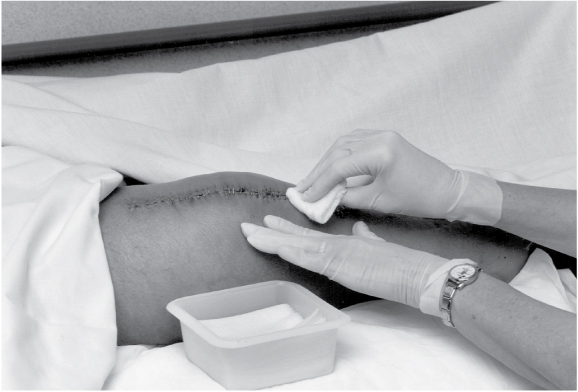
Continue to work outward from the incision in lines running parallel to it. Always wipe from the clean area toward the less clean area (usually from top to bottom). Use each gauze pad or swab for only one stroke to avoid tracking wound exudate and normal body flora from surrounding skin to the clean areas. Remember that the suture line is cleaner than the adjacent skin and the top of the suture line is usually cleaner than the bottom because more drainage collects at the bottom of the wound.
Use sterile, cotton-tipped applicators for efficient cleaning of tight-fitting wire sutures, deep and narrow wounds, and wounds with pockets. Remember to wipe only once with each applicator.
If the patient has a surgical drain, clean the drain’s surface last. Because moist drainage promotes bacterial growth, the drain is considered the most contaminated area. Clean the skin around the drain by wiping in half or full circles from the drain site outward.
Clean all areas of the wound to wash away debris, pus, blood, and necrotic material. Try not to disturb sutures or irritate the incision. Clean to at least 1″ (2.5 cm) beyond the end of the new dressing. If you aren’t applying a new dressing, clean to at least 2″ (5 cm) beyond the incision.
Check to make sure the edges of the incision are lined up properly, and check for signs of infection (heat, redness, swelling, induration, and odor), dehiscence, and evisceration. If you observe such signs or if the patient reports pain at the wound site, notify the doctor.
Wash skin surrounding the wound with normal saline, and pat dry using a sterile 4″ × 4″ gauze pad. Avoid oil-based soap because it may interfere with pouch adherence. Apply any prescribed topical medication.
Apply a skin protectant if needed.
Gently place sterile 4″ × 4″ gauze pads at the center of the wound, and move progressively outward to the edges of the wound site. Extend the gauze at least 1″ (2.5 cm) beyond the incision in each direction, and cover the wound evenly with enough sterile dressings (usually two or three layers) to absorb all drainage until the next dressing change. If ordered, pack the wound with gauze pads or strips folded to fit, using a sterile forceps. Avoid using cotton-lined gauze pads because cotton fibers can adhere to the wound surface and cause complications. Pack the wound, using the wet-to-damp method. Soak the packing material in solution and wring it out so that it’s slightly moist to provide a moist wound environment that absorbs debris and drainage. However, removing the packing won’t disrupt new tissue. Don’t pack the wound tightly because doing so will exert pressure and may damage the wound. Use large absorbent dressings (abdominal pads also known as ABDs) to form outer layers, if needed, to provide greater absorbency.
Secure the dressing’s edges to the patient’s skin with strips of tape to maintain the sterility of the wound site (as shown). Alternatively, secure the dressing with a T-binder or Montgomery straps to prevent skin excoriation, which may occur with repeated tape removal necessitated by frequent dressing changes.
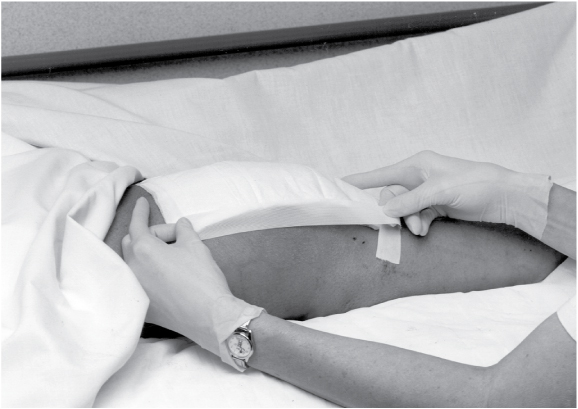
Make sure the patient is comfortable.
Properly dispose of the solutions and trash bag, and clean or discard soiled equipment and supplies according to your facility’s policy.
Use commercially precut gauze drain dressings or prepare a drain dressing by using sterile scissors to cut a slit in a sterile 4″ × 4″ gauze pad. Fold the pad in half; then cut inward from the center of the folded edge. Don’t use a cotton-lined gauze pad because cutting the gauze opens the lining and releases cotton fibers into the wound. Prepare a second pad the same way.
Gently press one drain dressing close to the skin around the drain so that the tubing fits into the slit. Press the second drain dressing around the drain from the opposite direction so that the two dressings encircle the tubing.
Layer two to four uncut sterile 4″ × 4″ gauze pads or large absorbent dressings around the tubing as needed to absorb expected drainage. Tape the dressing in place, or use a T-binder or Montgomery straps.
If the patient has two wounds in the same area, cover each wound separately with layers of sterile 4″ × 4″ gauze pads. Then cover each site with a large absorbent dressing secured to the patient’s skin with tape. Don’t use a single large absorbent dressing to cover both sites because drainage quickly saturates a pad, promoting cross-contamination.
When filling a wound, don’t fill it too tightly because doing so compresses adjacent capillaries and may prevent the wound edges from contracting. Remember to “open and fluff” gauze before placing in wound. Avoid overlapping damp gauze or other dressing onto surrounding skin because it macerates the intact tissue.
To save time when dressing a wound with a drain, use precut tracheostomy pads or drain dressings instead of custom-cut gauze pads to fit around the drain. If your patient is sensitive to adhesive tape, use paper or silk tape because it’s less likely to cause a skin reaction and peels off more easily than adhesive tape. Use a surgical mask to cradle a chin or jawline dressing to provide a secure dressing and avoid the need to shave the patient’s hair.
If ordered, use a collodion spray or similar topical protectant instead of a gauze dressing. This moisture- and contaminant-proof covering dries in a clear, impermeable film that leaves the wound visible for observation and avoids the friction caused by a dressing.
If a sump drain isn’t adequately collecting wound secretions, reinforce it with an ostomy pouch or another collection bag. Use waterproof tape to strengthen a spot on the front of the pouch near the adhesive opening; then cut a small x in the tape. Feed the drain catheter into the pouch through the x cut. Seal the cut around the tubing with more waterproof tape; then connect the tubing to the suction pump. This method frees the drainage port at the bottom of the pouch so you don’t have to remove the tubing to empty the pouch. If you use more than one collection pouch for a wound or wounds, record drainage volume separately for each pouch. Avoid using waterproof material over the dressing because it reduces air circulation and promotes infection from accumulated heat and moisture.

Because many doctors prefer to change the first postoperative dressing themselves to check the incision, don’t change the first dressing unless you have specific instructions to do so. If you have no such order and drainage comes through the dressings, reinforce the dressing with fresh sterile gauze. Request an order to change the dressing, or ask the doctor to change it as soon as possible. A reinforced dressing shouldn’t remain in place longer than 24 hours because it’s an excellent medium for bacterial growth.
For the recent postoperative patient or a patient with complications, check the dressing every 15 to 30 minutes or as ordered. For the patient with a properly healing wound, check the dressing at least once every 8 hours.
If the dressing becomes wet from the outside (e.g., from spilled drinking water), replace it as soon as possible to prevent wound contamination.
If your patient will need wound care after discharge, provide appropriate teaching. If the patient will be doing self care, stress the importance of using clean technique, and teach how to examine the wound for signs of infection and other complications. Also demonstrate how to change dressings, and give written instructions for all procedures to be performed at home. If possible, have the patient do a return demonstration of the dressing change.
Typically inserted during surgery in anticipation of substantial postoperative drainage, a closed-wound drain promotes healing and prevents swelling by suctioning the serosanguineous fluid that accumulates at the wound site. By removing this fluid, the closed-wound drain helps reduce the risk of infection and skin breakdown as well as the number of dressing changes. Hemovac and Jackson-Pratt closed drainage systems are most commonly used.
A closed-wound drain consists of perforated tubing connected to a portable vacuum unit. The distal end of the tubing lies within the wound and usually leaves the body from a site other than the primary suture line to preserve the integrity of the surgical wound. The tubing exit site is treated as an additional surgical wound; the drain is usually sutured to the skin.
If the wound produces heavy drainage, the closed-wound drain may be left in place for longer than 1 week. Drainage must be emptied and measured frequently to maintain maximum suction and prevent strain on the suture line.
Graduated biohazard cylinder  sterile laboratory container, if needed
  alcohol pads
  gloves
  gown
gown  face shield
  trash bag
  sterile gauze pads
  antiseptic cleaning agent
  prepackaged povidone-iodine swabs
Check the doctor’s order, and assess the patient’s condition.
Explain the procedure to the patient, provide privacy, and wash your hands.
Unclip the vacuum unit from the patient’s bed or gown.
Don clean gloves and using clean technique, release the vacuum by removing the spout plug on the collection chamber. The container expands completely as it draws in air.
Empty the unit’s contents into a graduated biohazard cylinder, and note the amount and appearance of the drainage. If diagnostic tests will be performed on the fluid specimen, pour the drainage directly into a sterile laboratory container, note the amount and appearance, and send it to the laboratory.
Maintaining clean technique, use an alcohol pad to clean the unit’s spout and plug.
To reestablish the vacuum that creates the drain’s suction power, fully compress the vacuum unit. With one hand holding the unit compressed to maintain the vacuum, replace the spout plug with your other hand.
The portable closed-wound drainage system draws drainage from a wound site, such as the chest wall postmastectomy (shown at left), by means of a Y-tube. To empty the drainage, remove the plug and empty it into a graduated cylinder. To reestablish suction, compress the drainage unit against a firm surface to expel air and, while holding it down, replace the plug with your other hand (as shown in the center). The same principle is used for the Jackson-Pratt bulb drain (shown at right).

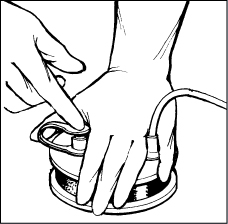
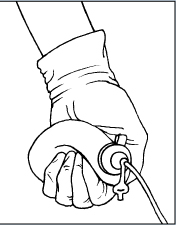
Check the patency of the equipment. Make sure the tubing is free from twists, kinks, and leaks because the drainage system must be airtight to work properly. The vacuum unit should remain compressed when you release manual pressure; rapid reinflation indicates an air leak. If reinflation occurs, recompress the unit and make sure the spout plug is secure.
Secure the vacuum unit to the patient’s gown. Fasten it below wound level to promote drainage. Don’t apply tension on drainage tubing when fastening the unit to avoid possible dislodgment. Remove and discard your gloves and wash your hands thoroughly.
Observe the sutures that secure the drain to the patient’s skin; look for signs of pulling or tearing and for swelling or infection of surrounding skin. Gently clean the sutures with sterile gauze pads moistened with NSS or other solution as ordered.
Properly dispose of drainage, solutions, and the trash bag, and clean or dispose of soiled equipment and supplies according to facility policy.
Empty the drain and measure its contents once during each shift if drainage has accumulated, more often if drainage is excessive. Removing excess drainage maintains maximum suction and avoids straining the drain’s suture line.
If the patient has more than one closed drain, number the drains so you can record drainage from each site.
Document your care.
| Take Note! |
| Documenting closed-wound drainage management Follow these tips when documenting your care of a closed-wound drainage unit. On the intake and output sheet, record drainage color, consistency, type, and amount. If the patient has more than one closed-wound drain, number the drains and record the information cited earlier separately for each drainage site. Also record:
|
Be careful not to mistake chest tubes with water seal drainage devices for closed-wound drains because the care of these devices differs from closed-wound drainage systems, and the vacuum of a chest tube should never be released.
Pressure ulcers are a serious health problem. Although incidence figures vary widely because of differences in methodology, setting, and subjects, data gathered through 10 years of nationwide studies reveal that 10% to 15% of the general population suffers from chronic pressure ulcers. Although this finding is significant in itself, prevalence in some groups—such as patients with spinal cord injuries, patients in intensive care units, and nursing home residents—is shockingly higher.
Although prevalence statistics vary, what has become starkly evident are the costs associated with pressure ulcers—the cost in terms of suffering and diminished quality of life for patients, the cost to the health care industry in terms of resources consumed and manpower hours dedicated to managing the problem, and the very real monetary cost to individuals, health insurers, and government agencies.
The problem is so acute that many insurers and government agencies now track outcomes to discern whether specific interventions help treat pressure ulcers and to encourage prevention, early intervention, and closer monitoring by the health care industry. Because pressure ulcers are chronic conditions—they’re hard to heal and tend to recur frequently—prevention and early intervention are critical for more effective management.
Data collected from Outcome and Assessment Information Set (OASIS) forms provide a basis for relating these costs to clinical outcomes. The OASIS-B1 form is currently used by home health care agencies, as mandated by the Centers for Medicare and Medicaid Services.
Better disease management in pressure ulcer cases depends on closer collaboration among government agencies, insurers, and health care professionals. There’s heartening evidence that this group effort is developing. All involved are paying closer attention to prevention and the effectiveness of interventions, and they’re finding better methods of quantifying and disseminating results. Soon, pressure ulcers will be a reportable condition for the CDC. In addition, the health care objectives for the nation as a whole reflect a better understanding of the problem’s severity. Healthy People 2020 (a report of the nation’s near-term health care goals) includes a goal of reducing the rate of pressure ulcers–related hospitalization by a 10% reduction in patients older than 65 years of age.
Chronic wounds are those that fail to heal in a timely manner, resist treatment, and tend to recur. Pressure ulcers are chronic wounds resulting from tissue death due to prolonged, irreversible ischemia brought on by compression of soft tissue.
Technically speaking, pressure ulcers are the clinical manifestation of localized tissue death due to lack of blood flow in areas under pressure.
Now, let’s back up a bit to break down and better understand this description. First of all, different tissues have different tolerances for compression. Muscle and fat have comparatively low tolerances for pressure, whereas skin has a somewhat higher tolerance. All cells, regardless of tissue type, depend on blood circulation for the oxygen and nutrients they need. Tissue compression interferes with circulation, reducing or completely cutting off blood flow. The result, known as ischemia, is that cells fail to receive adequate supplies of oxygen and nutrients. Unless the pressure relents, cells eventually die. By the time inflammation signals impending necrosis on the surface of the skin, it’s likely that necrosis has occurred in deeper tissues.
Pressure ulcers are most common in areas where pressure compresses soft tissue over a bony prominence in the body—the tissue is pinched between the outer pressure and the hard underlying surface. The other three causal factors of skin breakdown are shear, friction, and moisture. Planning effective interventions for prevention and treatment requires a sound understanding of the etiology of pressure ulcers and addressing the four causal factors.
Capillaries are connected to arteries and veins through intermediary vessels called arterioles and venules. In healthy individuals, capillary filling pressure is approximately 32 mm Hg where arterioles connect to capillaries and 12 mm Hg where capillaries connect to venules. Therefore, external pressure greater than capillary filling pressure can cause problems. In frail or ill people, capillary filling pressures may be much lower. External pressure that exceeds capillary perfusion pressure compresses blood vessels and causes ischemia in the tissues supplied by those vessels.
If the pressure continues long enough, capillaries collapse and thrombose, toxic metabolic by-products accumulate, and cells in nearby muscle and subcutaneous tissues begin to die. Muscle and fat are less tolerant of interruptions in blood flow than skin. Consequently, by the time signs of impending necrosis appear on the skin, underlying tissue has probably suffered substantial damage. Keep this “tip of the iceberg” effect in mind when assessing the size of a pressure ulcer.
Pressure points are likely areas for ulcer formation. These illustrations show the areas at highest risk for ulcers when the patient is in different positions.

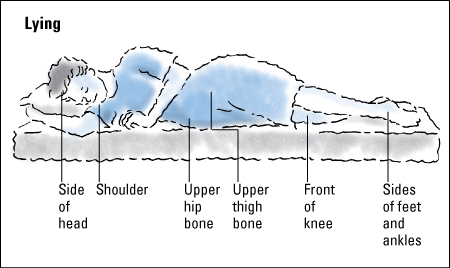
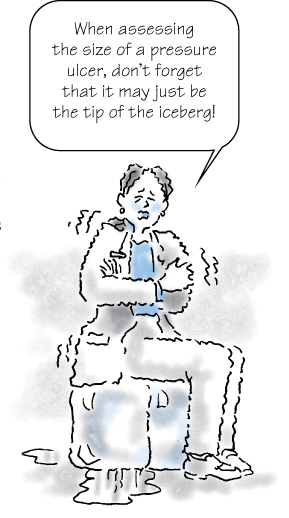
When external pressure exceeds venous capillary refill pressure (about 12 mm Hg), capillaries begin to leak. The resulting edema increases the amount of pressure on blood vessels, further impeding circulation. When interstitial pressure surpasses arterial intravascular pressure, blood is forced into nearby tissues (blanchable erythema). Continued capillary occlusion, lack of oxygen and nutrients, and buildup of toxic waste leads to necrosis of muscle, subcutaneous tissue and, ultimately, the dermis and epidermis.
The force associated with any given pressure increases as the amount of body surface exposed to the pressure decreases. For example, the force exerted on the buttocks of a person lying in bed is about 70 mm Hg. However, when the same person sits on a hard surface, the force exerted on the ischial tuberosities can be as much as 300 mm Hg. Consequently, bony prominences are particularly susceptible to pressure ulcers. However, they aren’t the only areas at risk. Ulcers can develop on any soft tissue subjected to prolonged pressure.
When blood vessels, muscle, subcutaneous fat, and skin are compressed between a bone and an external surface—a bed or chair, for instance—pressure is exerted on the tissues from the external surface and the bone. In effect, the external surface produces pressure and the bone produces counterpressure. These opposing forces create a cone-shaped pressure gradient. Although the pressure affects all tissues between these two points, tissues closest to the bony prominence suffer the greatest damage.
In this illustration, the V-shaped pressure gradient results from the upward force exerted by the supporting surface and the downward force of the bony prominence. Pressure is greatest on tissues at the apex of the gradient and lessens to the right and left of this point.
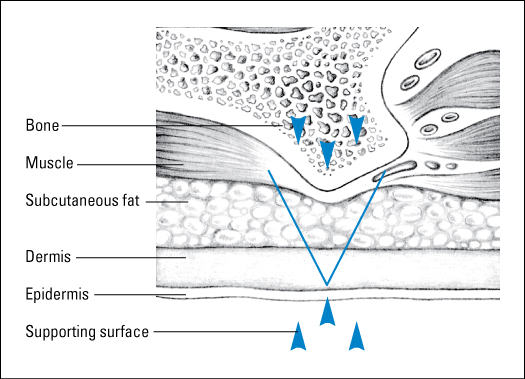
Over time, pressure causes a growing discomfort that prompts a person to change position before tissue ischemia occurs. In ulcer formation, an inverse relationship exists between time and pressure. Typically, low pressure for long periods is far more damaging than high pressure for short periods. For example, a pressure of 70 mm Hg sustained for 2 hours or longer almost always causes irreversible tissue damage, whereas a pressure of 240 mm Hg can be endured for a short time with little or no tissue damage. Furthermore, after the time-pressure threshold for damage passes, damage continues even after the pressure stops. Although pressure ulcers can result from one period of sustained pressure, they’re more likely to result from repeated ischemic events without adequate intervening time for recovery.
Shearing force intensifies the pressure’s destructive effects. Shear is a mechanical force that runs parallel, rather than perpendicular, to an area of skin; deep tissues feel the brunt of the force.
Shearing force is most likely to develop during repositioning or when a patient slides down after being placed in high-Fowler’s position. However, simply elevating the head of the bed increases shear and pressure in the sacral and coccygeal areas; gravity pulls the body down but the skin on the back resists the motion because of friction between the skin and the sheets. The result is that the skeleton (and attached tissues) actually slides somewhat beneath the skin (evidenced by the puckering of skin in the gluteal area), generating shearing force between outer layers of tissue and deeper layers. The force generated is enough to obstruct, tear, or stretch blood vessels.
Shear is a mechanical force parallel, rather than perpendicular, to an area of tissue. In this illustration, gravity pulls the body down the incline of the bed. The skeleton and attached tissues move, but the skin remains stationary, held in place by friction between the skin and the bed linen. The skeleton and attached tissues actually slide within the skin, causing skin to pucker in the gluteal area.
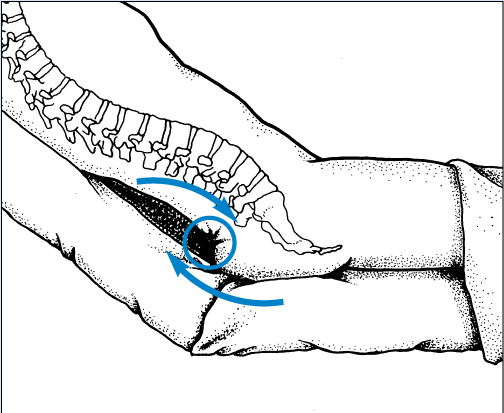
Shearing force reduces the length of time that tissue can endure a given pressure before ischemia or necrosis occurs. A sufficiently high level of shearing force can halve the amount of pressure needed to produce vascular occlusion. Research indicates that shearing force is responsible for the high incidence of triangular shaped sacral ulcers and the large areas of tunneling or deep sinus tracts beneath these ulcers.
Friction is another potentially damaging mechanical force. Friction develops as one surface moves across another surface—for example, the patient’s skin sliding across the bedsheet. Abrasions are wounds created by friction.
Those at particularly high risk for tissue damage due to friction include patients who have uncontrollable movements or spastic conditions, patients who wear braces or appliances that rub against the skin, and older patients. Friction is also a problem for patients who have trouble lifting themselves during repositioning. Rubbing against the sheet can result in an abrasion, which increases the potential for deeper tissue damage. Elevating the head of the bed, as discussed earlier, generates friction between the patient’s skin and the bed linen as gravity tugs the patient’s body downward. As the skeleton moves inside the skin, friction and shearing force combine to increase the risk of tissue damage in the sacral area. Such dry lubricants as cornstarch and adherent dressings with slippery backings can help reduce the impact of friction.
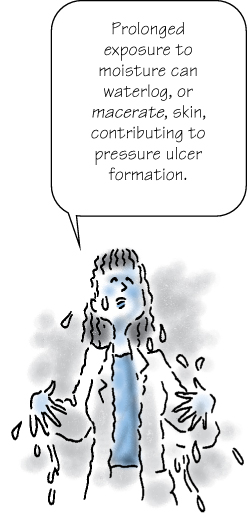
Prolonged exposure to moisture can waterlog, or macerate, skin. Maceration contributes to pressure ulcer formation by softening the connective tissue. Macerated epidermis erodes more easily, degenerates, and eventually sloughs off. In addition, damp skin adheres to bed linen more readily, making friction’s effects more profound. Consequently, moist skin is five times more likely to develop ulcers than dry skin. Excessive moisture can result from perspiration, wound drainage, bathing, or fecal or urinary incontinence.
Factors that increase the risk of developing pressure ulcers include advancing age, immobility, incontinence, infection, poor nutrition, and low blood pressure. High-risk patients, whether in an institution or at home, should be assessed regularly for pressure ulcers.
With advancing age, the skin becomes more fragile as epidermal turnover slows, vascularization decreases, and skin layers adhere less securely to one another. Older adults have less lean body mass and less subcutaneous tissue cushioning bony areas. Consequently, they’re more likely to suffer tissue damage due to friction, shear, and pressure.
Over time, skin loses its ability to function as efficiently or as effectively as it once did. As a result, the golden years of life place a person at greater risk for such injuries as pressure ulcers and tumors as well as various other skin conditions. This chart outlines the major changes that take place in the skin during the aging process and the implications of those changes for older people.
|

An older adult can experience altered pain perception, which can increase the risk of pressure ulcer development. Other common problems include poor nutrition, poor hydration, and impaired respiratory or immune systems.
Immobility may be the greatest risk factor for pressure ulcer development. The patient’s ability to move in response to pressure sensations as well as the frequency with which his position is changed should always be considered in risk assessment.
Incontinence increases a patient’s exposure to moisture and, over time, increases his risk of skin breakdown. Urinary and fecal incontinence create problems as a result of excessive moisture and chemical irritation. Due to pathogens in stools, fecal incontinence can cause more skin damage than urinary incontinence. Patients who have fecal and urinary incontinence have greater risk of skin breakdown from moisture. Feces contain both lipolytic and proteolytic enzymes which are inactivated during passage through the gastrointestinal tract. When the feces come into contact with the urine, the urea in the urine is converted into ammonia. Ammonia causes a shift in the pH of the skin and feces to alkalinity and this alkaline pH reactivates the enzymes in the feces.
Although the role of infection in pressure ulceration isn’t fully understood, animal studies on the effects of pressure and infection indicate that compression encourages a localized increase in bacteria concentration. Bacteria injected into animals localized at the compression site, resulting in necrosis at lower pressures relative to the control group. Researchers concluded that compressed skin lowers local resistance to bacterial infection and that infection may reduce the pressure needed to cause tissue necrosis. Furthermore, researchers noted higher infection rates in pedicle flaps when denervation or loss of motor and sensory nerve function occurred. This may explain why neurologically impaired patients are more susceptible to infection and pressure ulceration.
Proper nutrition is vitally important to tissue integrity. A strong correlation exists between poor nutrition and pressure ulceration, yet nutrition is all too commonly overlooked during treatment.
Increased protein is required for the body to heal itself. Albumin is one of the key proteins in the body. A patient’s serum albumin level is an important indicator of his protein levels. A subnormal serum albumin level is a late manifestation of protein deficiency. Normal serum albumin levels range from 3.5 to 5 g/dl. Serum albumin deficits are ranked as:
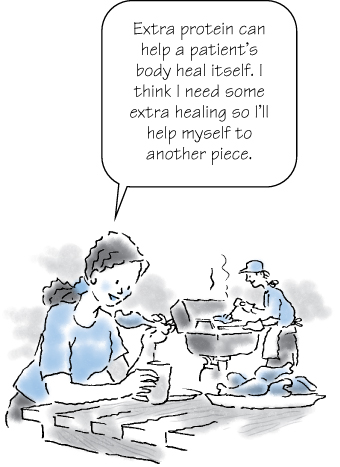
Mild—3 to 3.5 g/dl
Moderate—2.5 to 3 g/dl
Severe—less than 2.5 g/dl.
Pressure ulcer occurrence and severity are linked to malnutrition. One recent study found a direct correlation between pressure ulcer stage and degree of hypoalbuminemia (serum albumin level below 3.5 g/dl). Monitor the serum albumin levels of a high-risk patient and plan on nutritional intervention if he has hypoproteinemia.
Low arterial blood pressure is clearly linked to tissue ischemia, particularly in vascular patients. When blood pressure is low, the body shunts blood away from the peripheral vascular system that serves the skin and toward vital organs to ensure their health. As perfusion drops, the skin is less tolerant of sustained external pressure, and the risk of damage due to ischemia rises.
Several assessment tools are available to help determine a patient’s risk of developing pressure ulcers. Most are based on the work of Doreen Norton, who studied the pressure ulcer problem in Great Britain. Some years later, Gosnell and Braden developed a more refined scale based on data from independent studies.
Most scales use the following factors to determine a patient’s risk of developing pressure ulcers:
Immobility
Inactivity
Incontinence
Malnutrition
Impaired mental status or sensation.
Each category receives a value based on the patient’s condition. The sum of these values determines the patient’s score and level of risk. Scores for each category as well as the assessment as a whole guide the care team to develop appropriate interventions. Most health care facilities require an assessment score for every patient admitted.
| Memory Jogger |
To remember the five factors commonly used to determine a patient’s risk of developing pressure ulcers, think of the 5 I’s:
|
The Braden Pressure Sore Risk Assessment Scale is the most widely used scale. This tool scores etiologic factors that contribute to prolonged pressure as well as factors that contribute to diminished tissue tolerance for pressure. Factors scored in this assessment include sensory perception, moisture, activity, mobility, nutrition, and friction and shear. Each factor receives a score of 1 to 4, with the exception of friction and shear, which receives a score of 1 to 3. The highest possible score is 23; the lower the score, the higher the patient’s risk of pressure ulceration. A score of 18 or lower denotes a risk of pressure ulcers.
In nursing home populations, most pressure ulcers develop during the 2 weeks immediately following admission, so early identification of at-risk patients is crucial. The Wound Ostomy & Continence Nurses Society (WOCN) Guidelines for Pressure Ulcer Prevention suggest we need to establish a risk assessment policy in all health care settings and to establish accuracy of assessments between/among nurses.
Long-term care (LTC)—on admission and daily for a week—and then quarterly or follow your facility policy
Acute care—on admission and daily on each shift
Long-term acute care (LTAC)—daily for first week, then weekly
Pressure ulcer prevention focuses on compensating for prevailing risk factors and addressing the underlying pathophysiology. When planning interventions, be sure to adopt a holistic approach and consider all of the patient’s needs.
Managing the intensity and duration of pressure is a fundamental goal in prevention, especially for the patient with mobility limitations. Frequent, careful repositioning helps the patient avoid the damaging repetitive pressure that can cause tissue ischemia and subsequent necrosis. When repositioning the patient, it’s important to reduce the duration and the intensity of pressure.
Any time that you reposition the patient, look for telltale areas of reddened skin and make sure the new position doesn’t place weight on these areas. Avoid the use of donut-shaped supports or ring cushions that encircle the ischemic area because these can reduce blood flow to an even wider expanse of tissue. If the affected area is on an extremity, use pillows to support the limb and reduce pressure. As noted earlier, avoid raising the head of the bed more than 30 degrees to prevent tissue damage due to friction and shearing force.
Inactivity increases a patient’s risk of ulcer development. To the degree that the patient is physically able, encourage activity. Start with a short step—help him out of bed and into a chair. As his tolerance improves, help him walk around the room and then down the hall.
When the patient is on his side, never allow weight to rest directly on the greater trochanter of the femur. Instead, have the patient rest his weight on his buttock and use a pillow or foam wedge to maintain the position. This position ensures that no pressure is placed on the trochanter or sacrum. Also, a pillow placed between the knees or ankles minimizes the pressure exerted when one limb lies atop the other.
When repositioning a reclining patient, use the Rule of 30—that is, raise the head of the bed 30 degrees (as shown top right). Avoid raising the head of the bed more than 30 degrees to prevent the buildup of shearing pressure. When you must raise it more—at mealtimes, for instance—keep the periods brief.

As you reposition the patient from his left side to his right side, make sure his weight rests on his buttock, not his hip bone. Resting weight on his buttock reduces pressure on the trochanter and sacrum. The angle between the bed and an imaginary lateral line through his hips should be about 30 degrees. If needed, use pillows or a foam wedge to help the patient maintain the proper position . Cushion pressure points, such as the knees and shoulders, with pillows as well.

Heels present a particularly difficult challenge. Even with the aid of specially designed cushions, reducing the pressure on heels to below capillary refill pressure is almost impossible. Instead, suspend the patient’s foot so the bony prominence on the heel is under no pressure. A pillow or foam cushion under the patient’s calves can permit a comfortable position while suspending the foot. Take care to avoid knee contraction, however. Use a heel pressure redistribution device if your facility has this product.
Unlikely as it seems, a patient is more likely to develop pressure ulcers from sitting than from reclining. Sitting tends to focus all of the patient’s weight on the relatively small surface areas of the buttocks, thighs, and soles. Much of this weight is focused on the small area of tissue covering the ischial tuberosities. Proper posture and alignment help ensure that the weight of the patient’s body is distributed as evenly as possible.
Proper posture alone can significantly reduce the patient’s risk of ulcers at the ankles, elbows, forearms, wrists, and knees. Explain proper posture to your patient, if necessary, as described here:
Sit with back erect and against the back of the chair, thighs parallel to the floor, knees comfortably parted, and arms horizontal and supported by the arms of the chair. This posture distributes weight evenly over the available body surface area.
Keep feet flat on the floor to protect the heels from focused pressure and distribute the weight of the legs over the largest available surface area—the soles.
Avoid slouching, which causes shearing force and friction and places undue pressure on the sacrum and coccyx.
Keep the thighs and arms parallel to ensure that weight is evenly distributed all along the thighs and forearms, instead of being focused on the ischial tuberosities and elbows, respectively.
Part the knees to keep knees and ankles from rubbing together.
If the patient likes to use an ottoman or footstool, check to see if his knees end up above the level of his hips. If so, it means that his weight has shifted from the back of his thighs to the ischial tuberosities—and that he needs to find a different footstool. The same problem—knees above hips—can occur if the chair itself is too short for the patient.
Patients at risk should reposition themselves every 15 minutes while sitting, if they can. Patients with spinal cord injuries can perform wheelchair pushups to intermittently relieve pressure on the buttocks and sacrum. This requires a fair amount of upper body strength, however, and some patients might not have the strength. Others may have injuries that preclude using this technique.
Pillows may be the most enduring support tools on the planet, but they’re no longer the only options available. Today, people can choose from a vast array of support surfaces and cushioning aids. Special beds, mattresses, and seating options that employ foams, gels, water, and air as cushioning agents make it possible to tailor a comprehensive and personal system of supports for your patient.
Effective care depends on knowledge of the classes and types of products. In the course of your work, take time to learn as much as you can about these products.
| Pressure redistribution devices Here are some special pads, mattresses, and beds that help redistribute pressure when a patient is confined to one position for long periods:
|
Be informed, but be cautious as well. Using these devices can instill a false sense of security. It’s important to remember that as helpful as these devices may be, they aren’t substitutes for attentive care. Patients require individual turning schedules, regardless of the equipment used, and this schedule depends on your assessment of the patient’s tolerance for pressure.
When we discuss horizontal support surfaces, we are, for the most part, talking about beds, mattresses, and mattress overlays. These products employ foams, gels, water, and air to minimize the pressure a patient experiences while lying in bed.
There are specialty beds and mattresses that have low shear surfaces, may provide some air circulation, and have pressure redistribution properties. Beds that have the “turn assist” feature are to assist you with your turning. These beds do not turn the patient enough to provide pressure redistribution. There are other beds that do 30- to 60-degree turns and these beds are for pulmonary patients, not for pressure.
If the patient’s weight completely compresses a mattress overlay, the overlay isn’t helping. To make sure the patient isn’t bottoming out, hand check whenever a new overlay is put into service or if you suspect an overlay is breaking down. To hand check an overlay, slide one hand—palm up and fingers outstretched—between the mattress overlay and the mattress. If you can feel the patient’s body through the overlay, replace the overlay with a thicker one or add more air to the mattress.

Products designed to help prevent pressure ulcers while sitting fall into two broad categories: products that pressure and products that ease repositioning.
Ambulatory and wheelchair-dependent patients should use seat cushions to distribute weight over the largest possible surface area. Wheelchair-dependent patients require an especially rugged seat cushion that can stand up to the rigors of daily use. In most instances, a good foam cushion 3″ to 4″ (7.5 to 10 cm) thick suffices. However, many wheelchair-seating clinics now use computers to create custom seating systems tailored to fit the physiology and needs of each patient. For patients with spinal cord injuries, the selection of wheelchair seating is based on pressure evaluation, lifestyle, postural stability, continence, and cost. Custom seats and cushions are more expensive; however, in this case, the added expense is justifiable. Encourage wheelchair patients to replace seat cushions as soon as their current one begins to deteriorate.
Repositioning is just as important when the patient is sitting as when he’s reclining. For a patient requiring assistance, various devices are available. Such devices as overhead frames, trapezes, walkers, and canes can help the patient reposition himself as necessary. Health care personnel can help maneuver I.V. poles and other support equipment.
An effective skin integrity management plan includes regular inspections for tissue breakdown, routine cleaning and moisturizing, and steps to protect the skin from incontinence, if this is an issue.

The patient’s skin should be routinely inspected for pressure areas, depending on the patient’s assessed risk and his ability to tolerate pressure. Check for pallor and areas of redness—both signs of ischemia. Be aware that redness that occurs after the pressure is removed (called reactive hyperemia) is commonly the first external sign of ischemia due to pressure.
Usually, cleaning with a gentle soap and warm water suffices for daily skin hygiene. Use a soft cloth to pat, rather than rub, the skin dry. Avoid scrubbing or the use of harsh cleaning agents.
Skin becomes dry, flaky, and less pliable when it loses moisture. Dry skin is more susceptible to ulceration. Avoid powder, especially in an elderly patient, because it can cause further drying of the skin. The number of skin moisturizing products available is truly staggering, so it shouldn’t be hard to find one that the patient likes. The three categories of skin moisturizers are lotions, creams, and ointments.
Lotions are dissolved powder crystals held in suspension by surfactants. Lotions have the highest water content and evaporate faster than any other type of moisturizer. Consequently, lotions must be applied more often. The high water content is why lotions feel cool as they’re applied.
Creams are preparations of oil and water or water in oil. Water-in-oil creams are more moisturizing as they provide an oily barrier that reduces water loss from the stratum corneum, the outermost layer of the skin. Creams don’t have to be applied as often as lotions; three or four applications per day should do the trick.
Ointments are preparations of oil in water (typically lanolin or petrolatum) and consequently are the best for skin protection against moisture. They’re occlusive and effective as a skin protectant.
Although some moisture is good, too much is a problem. Waterlogged skin is easily eroded by friction and is more susceptible to irritants and bacteria colonization than dry skin. Close monitoring helps head off problems before they escalate.
Skin protection is particularly important if the patient is incontinent. Urine and feces introduce chemical irritants and bacteria as well as moisture, which can speed skin breakdown. To effectively manage incontinence, first determine the cause and then plan interventions that protect skin integrity while addressing the underlying problem.
In older adults, don’t assume that incontinence is a normal part of aging. It isn’t. Instead, consider factors that can precipitate incontinence, such as:

Fecal impaction and tube feeding (can cause diarrhea)
Reaction to a medication (can cause urinary incontinence)
Urinary tract infection
Mobility problems (can keep the patient from reaching the bathroom in time)
Confusion or embarrassment (can keep the patient from asking for a bedpan or help getting to the bathroom).
Whether the underlying cause is reversible or not, encourage the patient to ask for help when he needs a bedpan or needs to go to the bathroom. Use incontinence collectors, adult briefs or underpads that wick and gel, and skin barriers, as appropriate, to minimize skin damage. Step up the frequency of inspections, cleaning, and moisturizing for these patients.
Pressure ulcers can occur even with the best preventive measures. Effective treatment depends on a thorough assessment of the developing wound. Meaningful ulcer assessment requires a systematic, objective approach. In addition to the wound assessment parameters described in the beginning of the chapter, also document the ulcer history, including etiology, duration, and prior treatment.
Ulcer borders can provide clues to healing potential. Just as we discussed earlier, assess skin around the ulcer for:
Redness
Warmth
Induration or hardness
Swelling
Signs of infection.
Before you examine the ulcer, assess the patient’s pain. In most cases, pressure ulcers cause some degree of pain; in some cases, pain is severe. Have the patient rate their pain on a verbal or visual analog scale of 0 to 10, with 0 representing no pain and 10 representing severe pain. Similarly, ask the patient whether the pain interferes with their ability to function normally and, if so, to what degree.
Common locations for pressure ulcers include:
Sacrum
Coccyx
Ischial tuberosities
Greater trochanters
Elbows
Heels
Scapulae
Occipital bone
Sternum
Ribs
Iliac crests
Patellae
Lateral malleoli
Medial malleoli.
Ulcers are more common on the lower half of the body because it has more major bony prominences and more body weight than the upper half of the body. Two thirds of pressure ulcers occur within the pelvic girdle.
Tissue involvement ranges from blanchable erythema to the deep destruction of tissue associated with a full-thickness wound. Pressure against tissue interrupts blood flow and causes pallor due to tissue ischemia. If prolonged, ischemia causes irreversible and extensive tissue damage.
Usually, reactive hyperemia is the first visible sign of ischemia. When the pressure causing ischemia is released, skin flushes red as blood rushes back into the tissue. This reddening is called reactive hyperemia, and it’s due to a protective mechanism in the body that dilates vessels in the affected area to increase the blood flow and speed oxygen to starved tissues. Reactive hyperemia first appears as a bright flush that lasts about one half or three quarters as long as the ischemic period. If the applied pressure is too high for too long, reactive hyperemia fails to meet the demand for blood and tissue damage occurs.
Blanchable erythema (redness) can signal imminent tissue damage. Erythema results from capillary dilation near the skin’s surface. In the patient with pressure ulcers, the redness results from the release of ischemia-causing pressure. Blanchable erythema is redness that blanches—turns white—when pressed with a fingertip and then immediately turns red again when pressure is removed. Tissue exhibiting blanchable erythema usually resumes its normal color within 24 hours and suffers no long-term damage. However, the longer it takes for tissue to recover from finger pressure, the higher the patient’s risk of developing pressure ulcers.
In dark-skinned patients, erythema is hard to discern. Use bright light and look for taut, shiny patches of skin with a purplish tinge. Also, assess carefully for localized heat, induration, or edema, which can be better indicators of ischemia than erythema.
Nonblanchable erythema can be the first sign of tissue destruction. In high-risk patients, nonblanchable tissue can develop in as little as 2 hours. The redness associated with nonblanchable erythema is more intense and doesn’t change when compressed with a finger. If recognized and treated early, nonblanchable erythema is reversible.
In many cases, the full extent of ulceration can’t be determined by visual inspection because there may be extensive undermining along fascial planes. For example, tunneling can connect ulcers over the sacrum to ulcers over the trochanter of the femur or the ischial tuberosities. These cavities can contain extensive necrotic tissue.
The most widely used system for staging pressure ulcers is the classification system developed by the NPUAP. This staging system defines four stages.
Staging reflects the depth and extent of tissue involvement. Restaging isn’t needed unless deeper layers of tissue are exposed by treatments such as debridement. Keep in mind that although staging is useful for classifying pressure ulcers, it’s only one part of a comprehensive assessment. Ulcer characteristics and the condition of the surrounding skin provide equally important clues to the ulcer’s prognosis.
You can use pressure ulcer characteristics gained from your assessment to stage the pressure ulcer, as described here. Staging reflects the anatomic depth of exposed tissue. Keep in mind that if the wound contains necrotic tissue, you won’t be able to determine the stage until you can see the wound base.
| Stage I A stage I pressure ulcer is an area of skin with observable pressure-related changes when compared with an adjacent area or the same region on the other side of the body. This area presents clinically with persistent redness in patients with light skin or persistent red, blue, or purple in patients with darker skin. Indicators include a change in one or more of the following characteristics:
|

| Stage II A stage II pressure ulcer is a superficial partial-thickness wound that appears as an abrasion, a blister, or a shallow crater involving the epidermis and dermis.
|

| Stage III A stage III pressure ulcer is a full-thickness wound with tissue damage or necrosis of subcutaneous tissue that can extend down to, but not through, underlying fasciae. The ulcer appears as a deep crater with or without undermining of adjacent tissue.
|
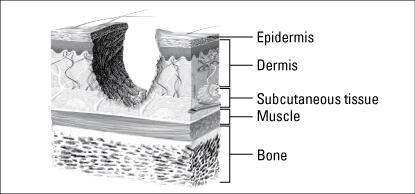
| Stage IV A stage IV pressure ulcer involves full-thickness skin loss with extensive damage, destruction, or necrosis to muscle, bone, and supporting structures (such as tendons and joint capsule). Undermining and sinus tracts may be present as well.
|

| Unstageable This represents a full-thickness tissue loss in which actual depth of the ulcer is completely obscured by slough (yellow, tan, gray, green, or brown) and/or eschar (tan, brown or black) in the wound bed. The true depth cannot be determined until this tissue is removed, but we know it will be either a stage III or IV. |
| Suspected deep tissue injury—depth unknown This purple or maroon localized area of discolored intact skin or blood-filled blister occurs due to damage of underlying soft tissue from pressure and/or shear. This area may be preceded by tissue that is painful, firm, mushy, boggy, warmer, or cooler as compared to adjacent tissue. Deep tissue injury may be difficult to detect in individuals with dark skin tones. |
Ulcers that occur related to medical devices often form on mucosal tissue (lips, nares, urinary meatal opening, tongue, etc.) cannot be staged with the pressure ulcer staging system. Mucous membranes do not have the same histologic structure as the skin. Classify these ulcers as partial or full thickness.
When an ulcer develops and the tissue and structures are destroyed, they are not replaced during the healing process. Therefore, a stage IV pressure ulcer does not become a stage III as it becomes more shallow, then a II and then a I. This ulcer is a healing stage IV or a healed stage IV, period!
Treatment of pressure ulcers follows the four basic steps common to all wound care:
Debride necrotic tissue and clean the wound to remove debris.
Provide a moist wound-healing environment through the use of proper dressings.
Protect the wound from further injury.
Provide nutrition that’s essential to wound healing.
A key element in all pressure ulcer treatment plans is identifying and treating, when possible, the underlying pathophysiology. If the cause of the ulcer remains, existing ulcers don’t heal and new ulcers develop.
Typically, wound care involves cleaning the wound, debriding necrotic tissue, and applying a dressing that keeps the wound bed moist. Topical agents are used to resolve various issues.
Remember that the goal of patient education is to improve the outcome. For any care plan to succeed after the patient leaves the hospital, the patient or caregiver must understand the care plan, be physically capable of carrying it out at home, and perceive value in the information and the outcomes. Therefore, education and goal establishment should take into consideration the preferences and lifestyles of the patient and his family whenever possible.
Teach the patient and his family how to prevent pressure ulcers and what to do when they occur. Explain repositioning, and show them what a 30-degree laterally inclined position looks like. If the patient needs assistance with repositioning, make sure he knows the types of devices available and where to obtain them.
Pressure ulcer do’s and don’tsWith proper skin care and frequent position changes, patients and their caregivers can keep the patient’s skin healthy—a crucial element in pressure ulcer prevention. Here are some important do’s and don’ts to pass along to patients:
Do’s
|
Don’ts
|
Show the patient how he can inspect his back and other areas using a mirror. If the patient can’t do this, a family member can help. Make sure he understands the importance of inspecting skin over bony prominences for pressure-related damage every day.
If the patient needs to apply dressings at home, make sure he knows the proper ways to apply and remove them. Tell him where he can get supplies if he runs low.

Ensuring proper nutrition can be difficult, but the patient and his family need to know how important proper nutrition is to the healing process. Provide materials on nutrition and maintaining an ideal weight, as appropriate. Show them how to create an easy-to-read chart of care reminders for a wall at home.
Pressure ulcers should be reassessed weekly. Measure progress by the reduction in necrotic tissue and drainage and the increase in granulation tissue and epithelial growth. Clean, vascularized pressure ulcers should show evidence of healing within 2 weeks. If they don’t, and the patient has followed the guidelines for nutrition, repositioning, use of support surfaces, and wound care, it’s time to reevaluate the care plan.
References
Association for Advancement in Wound Care. (2012). Pressure Ulcer Guidelines. Retrieved from http://aawconline.org/professional-resources/resources/
Baranoski, S., & Ayello, E. (2011). Wound care essentials: Practice principles (3rd ed.). Philadelphia, PA: Lippincott Williams & Wilkins.
Beitz, J. M. (2014). Providing quality skin and wound care for the bariatric patient: An overview of clinical challenges. Ostomy Wound Management, 60(1), 12–21.
Bryant, R. A., & Nix, D. P. (2011). Acute and chronic wounds: Current management concepts (4th ed.). St. Louis, MO: Mosby.
Doughty, D. (2012). Differential assessment of trunk wounds: Pressure ulceration versus incontinence associated dermatitis versus intertriginous dermatitis. Ostomy Wound Management, 58(4), 20–22.
European Pressure Ulcer Advisory Panel. (n.d.). Retrieved from http://www.epuap.org
Hurd, T. (2013). Evaluating the cost and benefits of innovations in chronic wound care products and practices [Supplement]. Ostomy Wound Management, 2–15.
Krasner, D. L., Rodeheaver, G. T., & Sibbald, R. G. (Eds.) (2012). Chronic wound care: A clinical source book for healthcare professionals (5th ed.). Wayne, PA: HMP Communications.
Langemo, D. K., Anderson, J., Hanson, D., Hunter, S., & Thompson, P. (2008). Measuring wound length, width, and area: Which technique? Advances in Skin and Wound Care, 21, 42–45.
LeBlanc, K., Baranoski, S., Christensen, D., Langemo, D., Sammon, M. A., Edwards, K., . . . Regan, M. (2013). International skin tear advisory panel: A tool kit to aid in the prevention, assessment, and treatment of skin tears using a simplified classification system. Advances in Skin and Wound Care, 26(10), 459–476.
National Pressure Ulcer Advisory Panel. (n.d.). Retrieved from http://www.npuap.org
National Pressure Ulcer Advisory Panel and European Pressure Ulcer Advisory Panel. (2009). Prevention and treatment of pressure ulcers: Clinical practice guideline. Washington, DC: National Pressure Ulcer Advisory Panel.
Sibbald, R. G., Krasner, D. L., & Woo, K. Y. (2011). Pressure ulcer staging revisited: Superficial skin changes & deep pressure ulcer framework. Advances in Skin and Wound Care, 24(12), 571–580.
U.S. Department of Health and Human Services. (n.d.). LHI infographic gallery. Retrieved from http://www.healthypeople.gov/2020/LHI/inforgraphicGallery.aspx
Wound, Ostomy, Continence Nurses Society. (2010). Guideline for prevention and management of pressure ulcers. Mt. Laurel, NJ: Author.
![]()
The main functions of the skin include:
Which type of wound closes by primary intention?
Which wound bed color indicates normal, healthy granulation tissue?
Which intervention is most appropriate for preventing excessive heel pressure?
 If you answered all four questions correctly, superb! You have a lot of integrity when it comes to knowledge of skin and wounds.
 If you answered three questions correctly, great! You’re holding up well under the pressure.
 If you answered fewer than three questions correctly, relax! Just take a load off, review the chapter, and try again.
Outline