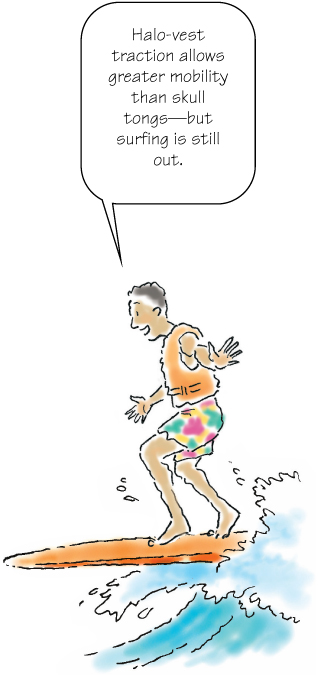
Halo-vest traction immobilizes and stabilizes the cervical spine. It can be used alone or in conjunction with spine surgery for patients with an unstable cervical spine as a result of a spinal fracture of dislocation, traumatic cervical spine injury, inflammatory disease, degenerative disease, or an infection. This procedure is performed by an orthopedic surgeon, with nursing assistance, in the emergency department, a specially equipped room, or in the operating room after surgical reduction of vertebral injuries. (See A look at the halo-vest traction device.)
A halo ring device is attached using four to six stabilizing pins that are screwed into the skull. A vest is applied once the cervical spine is aligned. The advantage to this method versus cervical tongs is the patient can sit up, get up to a chair, and ambulate if able. It also carries less risk of infection because it doesn't require skin incisions and drill holes to position skull pins.
Halo-vest traction unit  halo ring cervical collar or sandbags (if needed) plastic vest board or padded headrest tape measure halo ring conversion chart scissors 4'' × 4'' gauze pads povidone-iodine solution sterile gloves Allen wrench four positioning pins multiple-dose vial of 1% lidocaine (with or without epinephrine) alcohol pads 3-mL syringe 25G needles five sterile skull pins (one more than needed) torque screwdriver sheepskin liners cotton-tipped applicators ordered cleaning solution medicated powder or cornstarch sterile water or normal saline solution optional: hair dryer, pain medication (such as an analgesic).
Full package
Most facilities supply packaged halo-vest traction units that include software (jacket and sheepskin liners), hardware (halo, head pins, upright bars, and screws), and tools (torque screwdriver, two conventional wrenches, Allen wrench, and screws and bolts). These units don't include sterile gloves, povidone-iodine solution, sterile drapes, cervical collars, or equipment for local anesthetic injection.
Obtain a halo-vest traction unit with halo rings and plastic vests in several sizes. Check the expiration date of the prepackaged tray and check the outside covering for damage to ensure the sterility of the contents. Then assemble the equipment at the patient's bedside. Check to see that a consent form was signed and in the chart.
Check the order and verify the correct patient using two patient identifiers. Check the support that was applied to the patient's neck on the way to the hospital. If necessary, apply the cervical collar immediately or immobilize the head and neck with sandbags. Keep the cervical collar or sandbags in place until the halo is applied. This support will then be carefully removed to facilitate application of the vest. Because the patient is likely to be frightened, try to reassure him.
Time to redecorate
Remove the headboard and any furniture at the head of the bed to provide ample working space. Then carefully place the patient's head on a board or on a padded headrest that extends beyond the edge of the bed.
Never put the patient's head on a pillow before applying the halo to avoid further injury to the spinal cord.
Elevate the bed to a working level that gives the doctor easy access to the front and back of the halo unit.
All ducks in a row
Stand at the head of the bed and see if the patient's chin lines up with his midsternum, indicating proper alignment. If ordered, support the patient's head in your hands and gently rotate the neck into alignment without flexing or extending it.
Assisting with halo application
Ask another nurse to help you with the procedure.
Explain the procedure to the patient and family, perform hand hygiene, and provide privacy.
Have the assisting nurse hold the patient's head and neck stable while the doctor removes the cervical collar or sandbags. Maintain this support until the halo is secure while you assist with pin insertion.
The doctor measures the patient's head with a tape measure and refers to the halo ring conversion chart to determine the correct ring size. (The ring should clear the head by ⅔'' [1.5 cm] and fit ½'' [1.3 cm] above the bridge of the nose.)
The doctor selects four pin sites: ½'' above the lateral one-third of each eyebrow and ½'' above the top of each ear in the occipital area. He also takes into account the degree and type of correction needed to provide proper cervical alignment.
Trim the hair at the pin sites with scissors to facilitate subsequent care and help prevent infection. Then use 4'' × 4'' gauze pads soaked in povidone-iodine solution to clean the sites.
Open the halo-vest unit using sterile technique to avoid contamination. The doctor puts on the sterile gloves and removes the halo and the Allen wrench. He then places the halo over the patient's head and inserts the four positioning pins to hold the halo in place temporarily.
Help the doctor prepare the anesthetic. First, clean the injection port of the multiple-dose vial of lidocaine with the alcohol pad. Then, invert the vial so the doctor can insert a 25G needle attached to the 3-mL syringe and withdraw the anesthetic.
The doctor injects the anesthetic at the four pin sites. He may change needles on the syringe after each injection.
The doctor removes four of the five skull pins from the sterile setup and firmly screws in each pin at a 90-degree angle to the skull. When the pins are in place, he removes the positioning pins. He then tightens the skull pins with the torque screwdriver.
Applying the vest
After the doctor measures the patient's chest and abdomen, he selects a vest of appropriate size.
Place the sheepskin liners inside the front and back of the vest to make it more comfortable to wear and to help prevent pressure ulcers.
Help the doctor carefully raise the patient while the other nurse supports the head and neck. Slide the back of the vest under the patient and gently lay him down. The doctor then fastens the front of the vest on the patient's chest using Velcro straps.
The doctor attaches the metal bars to the halo and vest and tightens each bolt in turn to avoid tightening any single bolt completely, causing maladjusted tension. When halo-vest traction is in place, X-rays should be taken immediately to check the depth of the skull pins and verify proper alignment. (See Complications of halo-vest traction.)
Caring for the patient
Take routine and neurologic vital signs at least every 2 hours for 24 hours (preferably every hour for 48 hours) and then every 4 hours until stable.
Notify the doctor immediately if you observe loss of motor function or decreased sensation; these findings could indicate spinal cord trauma.
Check the order. Perform hand hygiene and don gloves. Verify the patient with two patient identifiers.
Gently clean the pin sites every 4 hours with cotton-tipped applicators dipped in cleaning solution. Rinse the sites with sterile water or normal saline solution to remove excess cleaning solution. Then clean the pin sites with povidone-iodine solution or another ordered solution. Meticulous pin site care prevents infection and removes debris that might block drainage and lead to abscess formation. Watch for signs of infection—a loose pin, swelling or redness, purulent drainage, pain at the site—and notify the doctor if these signs develop. (See Homeward bound with halo-vest traction.)
The doctor retightens the skull pins with the torque screwdriver 24 and 48 hours after the halo is applied. If the patient complains of a headache after the pins are tightened, obtain an order for an analgesic. If pain occurs with jaw movement, notify the doctor because this may indicate that pins have slipped onto the thin temporal plate.
Examine the halo-vest unit every shift to make sure that everything is secure and that the patient's head is centered within the halo. If the vest fits correctly, you should be able to insert one or two fingers under the jacket at the shoulder and chest when the patient is lying supine.
Wash the patient's chest and back daily.
Perform hand hygiene and don gloves. Verify the correct patient using two patient identifiers.
Place the patient on his back or side.
Unbuckle one side of the vest while maintaining cervical spine alignment if permitted per facility policy.
Assess the patient's skin and ensure the sheepskin lining is not wrinkled or wet because it can cause skin breakdown. As you press the liner down on the vest, use a flashlight to assess the skin. Patients with decreased sensation are at greater risk skin breakdown.
Bathe the skin with soap and water. If you are not permitted to unbuckle the vest, slide a damp towel between the liner and the skin to wash all skin surfaces. Dry the skin thoroughly. Avoid lotion or powder because it can cause matting of the sheepskin. However, if the patient is itching, a light dusting or cornstarch can be used.
Rebuckle the vest then turn the patient on the other side and repeat the bathing procedure.
Discard supplies, remove gloves, and perform hand hygiene. (See Documenting halo-vest traction.)
If your facility's policy allows, change the vest lining as necessary.
Be careful not to put any stress on the apparatus, which could knock it out of alignment and lead to subluxation of the cervical spine.
Never lift the patient up by the vertical bars. This could strain or tear the skin at the pin sites or misalign the traction.
Mr. (or Ms.) Goodwrench
Keep two conventional wrenches available at all times. In case of cardiac arrest, use them to remove the distal anterior bolts. Pull the two upright bars outward. Unfasten the Velcro straps and remove the front of the vest. Use the sturdy back of the vest as a board for cardiopulmonary resuscitation (CPR). To prevent subluxating the cervical injury, start CPR with the jaw-thrust maneuver, which avoids hyperextension of the neck. Pull the patient's mandible forward while maintaining proper head and neck alignment. This pulls the tongue forward to open the airway.
To prevent falls, walk with the ambulatory patient. Remember, he'll have trouble seeing objects at or near his feet and the weight of the halo-vest unit (about 10 lb [4.5 kg]) may throw him off balance. If the patient is in a wheelchair, lower the leg rests to prevent the chair from tipping backward.
Breath check
Because the vest limits chest expansion, routinely assess pulmonary function, especially in a patient with pulmonary disease. (See Documenting halo-vest traction.)
Educate the patient and family that pins transmit vibration and can cause a cold sensation to the head.
Teach the family how to do pin care and have them perform a return demonstration.
Instruct the patient/family to notify the physician immediately if the halo vest or pins become loose and not to try and fix it themselves.
Instruct the family to notify the physician immediately if there is a change in neurologic function, difficulty swallowing, or an increase in pain.
Outline